4 min read
How to Run Rocky Linux from Windows
We are often asked how Windows users can test Rocky Linux. After all, not everyone is ready to overwrite a Windows installation for Linux (nor does everyone have access to a spare server or workstation). And so, if Windows has been your primary operating system for years and you're interested in seeing if Rocky Linux might be a good fit, what are your options?
There are three viable choices: running a live instance of Rocky Linux, importing Rocky Linux into Windows Subsystem for Linux (which is outlined in this official Rocky Linux document), or using a tool like VirtualBox to run it as a virtual machine.
First, let's explain the concept behind a live image.
What is a live image (and how do you use it)?
Simply put, a live image can be run on your computer without making any changes to the hard disk. Live images run completely from RAM, and any configurations made or files created are lost when you reboot the machine.
You use a live image by downloading an ISO of the Rocky Linux workstation release from the Alternative Downloads page, and then "burning" it to a USB drive (using a tool like UNetbootin - Figure 1).
Figure 1
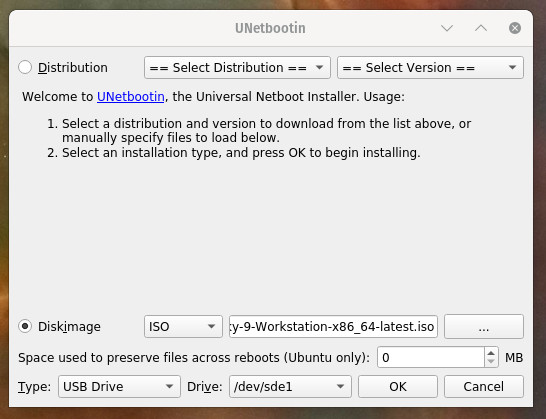
UNetbootin is a simple tool for burning ISO images to a USB drive
This doesn't just copy the ISO images. Instead, it creates a bootable, portable operating system on the USB drive that can be used to boot any computer that matches the architecture of the downloaded image. In other words, if your computer is an x86_64 machine, you would want to burn the x86_64 ISO to the USB drive.
Once you've started the machine, make sure to boot from the correct (USB) drive, and you'll be presented with a window asking if you want to Try Rocky Linux or Install to Hard Drive (Figure 2).
Figure 2
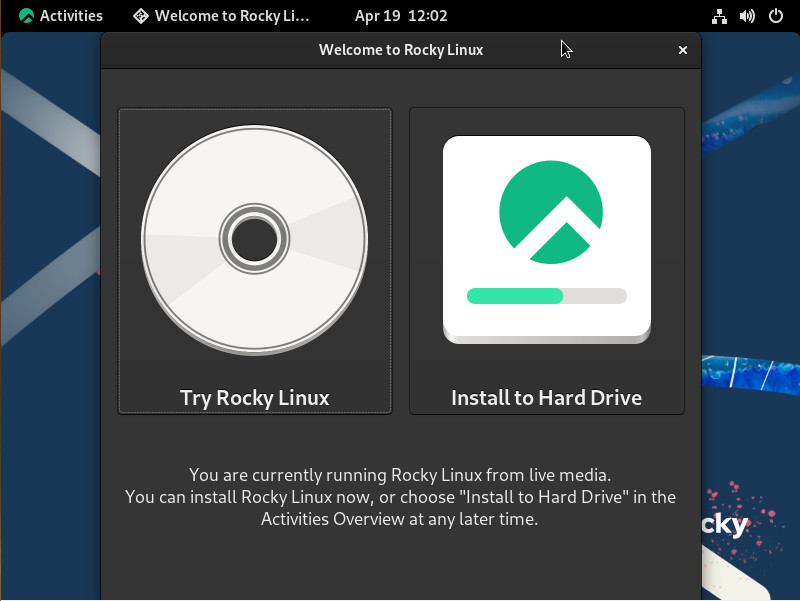
The Rocky Linux Workstation can be easily run in live mode
Click Try Rocky Linux, and the desktop will appear, where you can start testing the operating system to see if it is what you're looking for.
Once you've completed your test, you can either reboot the machine, remove the USB drive, and boot back into Windows, or click Activities (top left of the desktop), type Install, click Install To Hard Drive, and walk through the simple-to-use installation wizard.
Creating a Rocky Linux virtual machine
The next method is probably the best choice for most users for a couple of reasons:
-
You don't have to bother burning an ISO to a USB drive.
-
All configurations and data are saved.
There's also the benefit of always having the virtual machine available to you. All you have to do is start it up, and you're good to go. Virtual machines can also be used as desktops and servers and can even be made accessible to your LAN.
Creating a virtual machine with VirtualBox is simple. And given that VirtualBox is free and can be installed on Linux, MacOS, and Windows, there's no limit to the combinations of hosts/guests you can create.
The first thing you must do is download VirtualBox for Windows and install it. The installation is as simple as double-clicking the downloaded .exe file and walking through the install wizard.
Once VirtualBox is installed, click New or Machine > New (Figure 3).
Figure 3
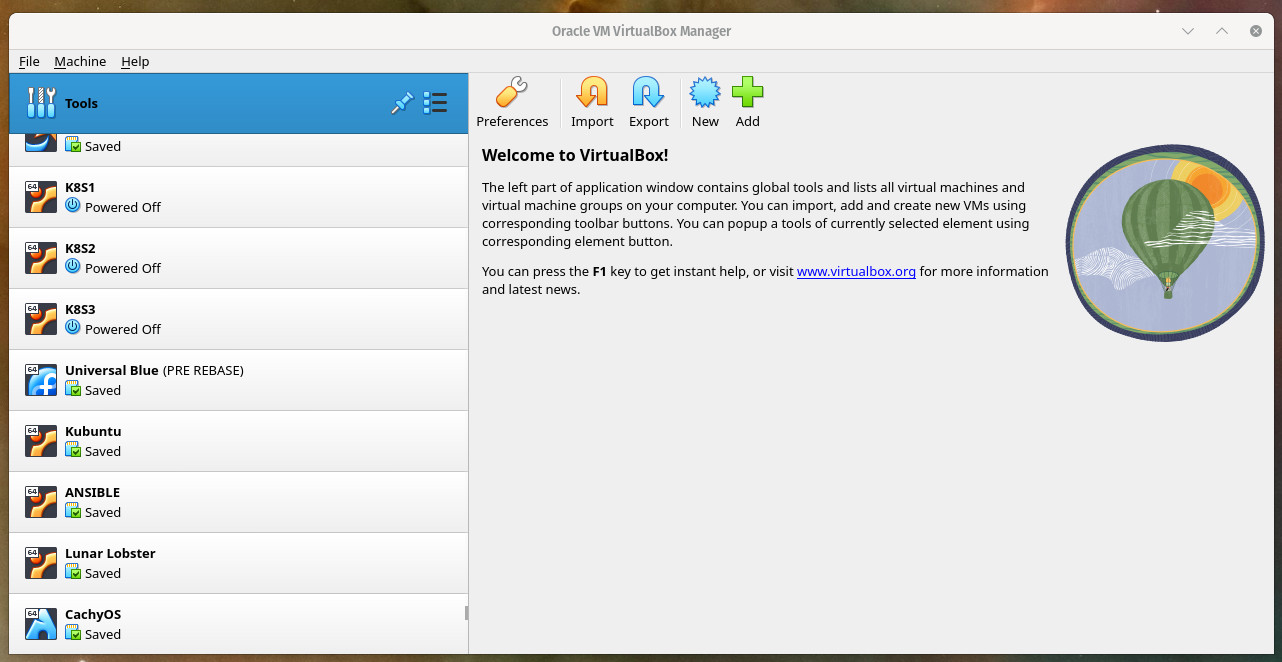
The main VirtualBox window
Here's how to configure your VM.
Name and Operating system (Figure 4):
-
Name - Give this a name, such as Rocky Linux 9 VM.
-
ISO Image: Click the drop-down, select Other, and (using your default file manager) navigate to where you saved the Rocky Linux ISO and select it.
-
Type - Linux 2.6/3.x/4.x/5.x (64-bit)
-
Version - Red Hat 9.x (64-bit)
Figure 4
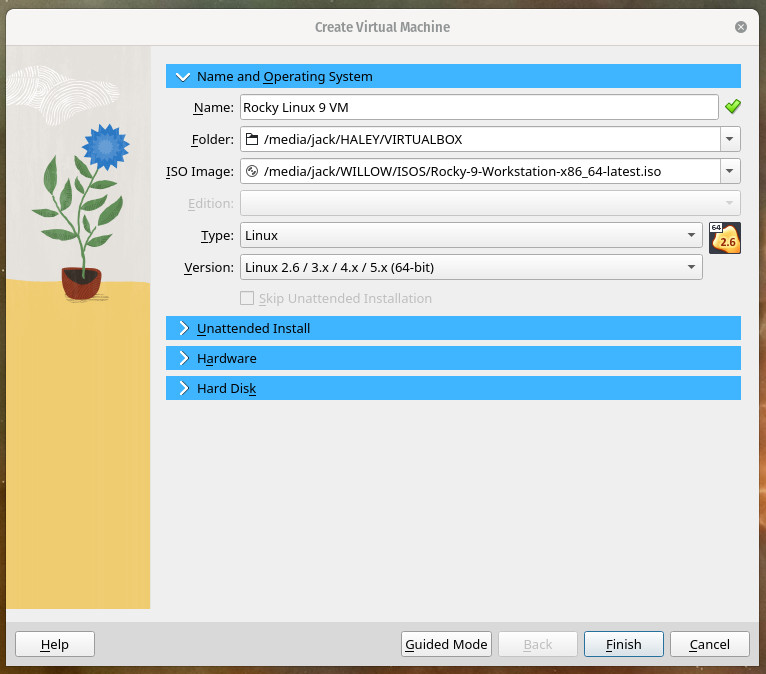
The Virtual Machine Name and Operating System section
Hardware (Figure 5):
-
Base Memory - Set the amount of RAM you want to allow the host to use. I would suggest a minimum of 3072.
-
Processors - Set this to 2 (minimum).
Figure 5
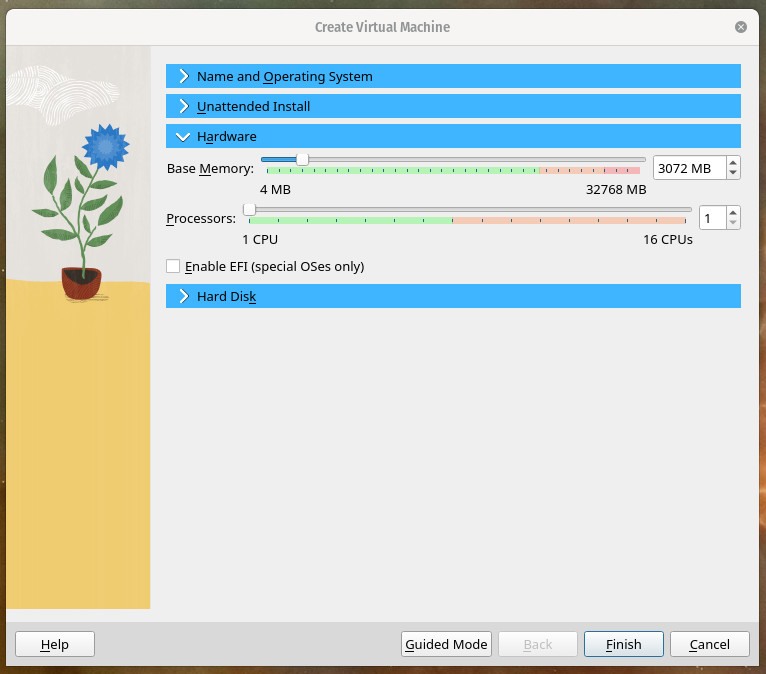
The Virtual Machine hardware configuration
Hard Disk (Figure 6):
Give the virtual machine a good enough amount of hard disk space. I suggest 64 GB if you plan on using this virtual machine for more than just testing.
Figure 6
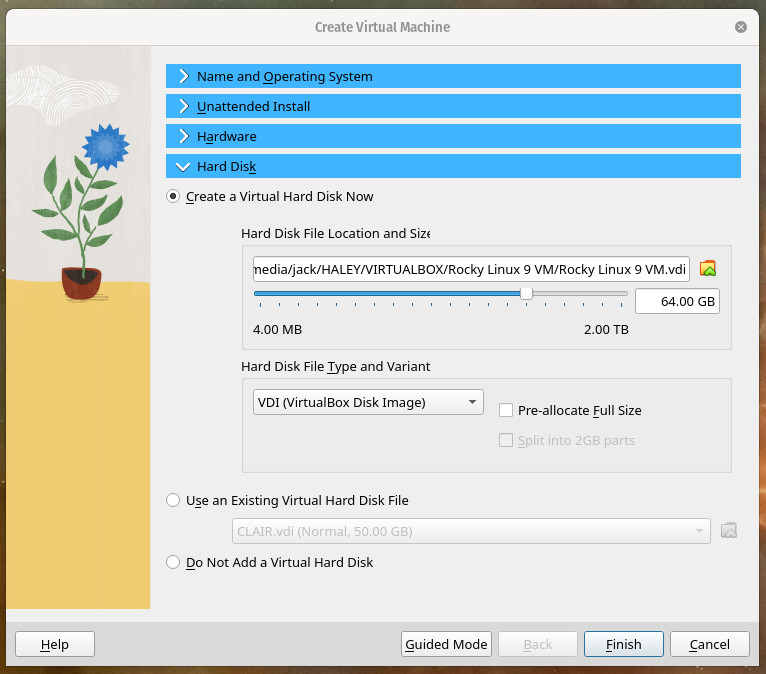
Configuring a virtual hard disk for Rocky Linux
One thing to keep in mind is that the virtual hard disk won't automatically take up the full amount. So, if you create a 64 GB drive, it won't equate to 64 GB on your local storage unless you use that much space on the virtual machine.
Click Finish, and you'll be returned to the VirtualBox main window, where you'll want to take care of one more configuration option.
Configuring your network
If you want to be able to access the Rocky Linux machine from your network, you'll need to change the default setting. Select the new Rocky Linux virtual machine in the left sidebar, and then click Settings. In the resulting window (Figure 7), select Network in the left sidebar, click the Attached To drop-down, and change NAT to Bridged Adapter.
Figure 7
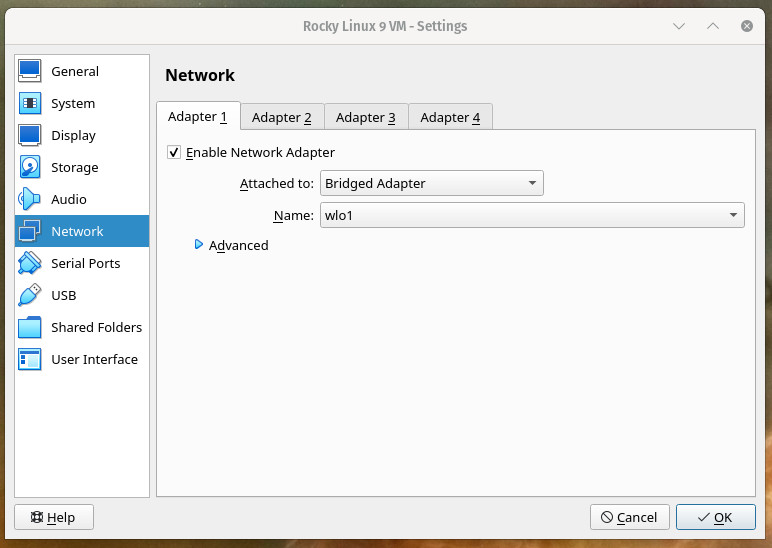
Configuring the virtual machine network so it can be reached from your LAN
Click OK. Make sure the Rocky Linux virtual machine is still selected in the sidebar, and click Start. When the virtual machine boots, you can then start the installation process in the same way you would if installing Rocky Linux on bare-metal.
And that is how easy it is to test and run Rocky Linux from a Windows machine.
Built for Scale. Chosen by the World’s Best.
1.4M+
Rocky Linux instances
Being used world wide
90%
Of fortune 100 companies
Use CIQ supported technologies
250k
Avg. monthly downloads
Rocky Linux


