3 min read
How to Deploy Podman Containers with Cockpit

Cockpit is a great tool for admins who'd prefer to work with Rocky Linux via a GUI. We've already introduced you to the platform and even demonstrated how to add third-party modules to expand the feature set. One of the third-party modules is aimed at deploying and managing Podman containers, and for anyone looking to get into containers, this is a great place to start.
With the help of the Podman Cockpit module, you can do the following with containers:
-
Deploy
-
Start
-
Stop
-
Force restart
-
Pause
-
Checkpoint
-
Commit
-
Delete
You can also add environment variables, add port mappings, configure memory limits and CPU shares, set restart policies, add volumes, and run health checks. Although it might not be quite as flexible as the command line, if you're just starting your journey with containers, this is a great place to start. Or, if you already have a good grasp of containers, using Cockpit is a very efficient method for deploying and managing them.
We're going to walk you through the process of deploying and managing containers with the Cockpit Podman module.
What you'll need
The only things you'll need are:
-
A running instance of Rocky Linux.
-
The cockpit-podman module installed.
-
A user with sudo privileges.
That's it. Let's get to work. The first thing we'll show you is how to deploy a basic NGINX container that can be reached from your LAN. Then, we'll show you how to deploy the same container, but with an added persistent volume.
Deploy a basic NGINX container
Open a web browser and point it to http://SERVER:9090 (where SERVER is the IP address of your Rocky Linux server). If you're not sure what the IP address is, you can log into Rocky Linux, open a terminal, and issue the command:
ip a
When the Cockpit console opens, log in with a user that has sudo privileges and then click Podman Containers in the left navigation. In the resulting window, click Create Container. In the resulting window, here's what you'll want to configure in the details tab (Figure 1):
-
Name: You can either enter a name or use the randomly generated name.
-
Image: Type nginx and then select the entry you prefer (either from the Red Hat or Docker registry).
-
Command: nginx -g "daemon off;"
-
Enable Pull latest image.
-
Restart Policy: Always.
Figure 1
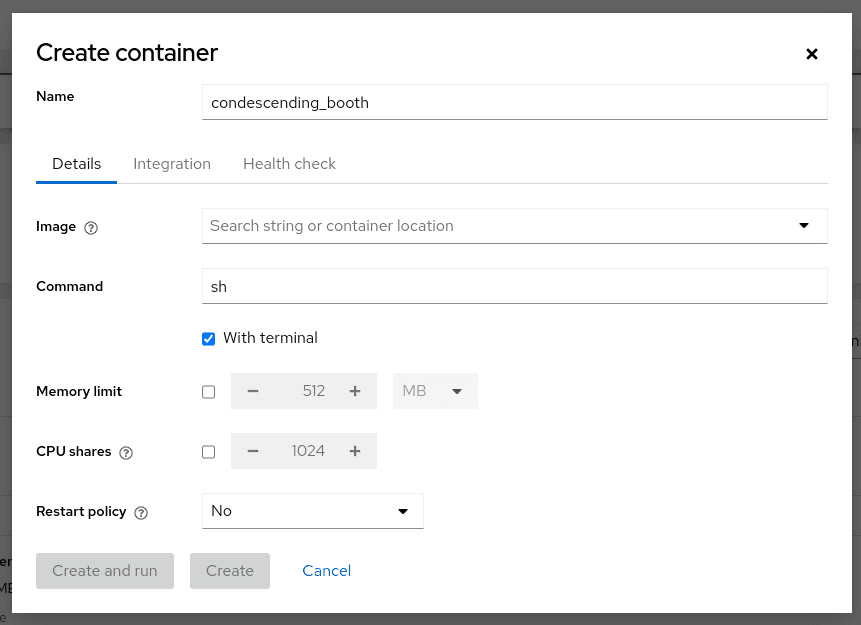
Basic container details via Cockpit.
Notice above that you have to add the command nginx -g "daemon-off;". Why? Although the NGINX container will deploy just fine without it, if you don't add the command, you can't access the deployed container. The -g option informs NGINX that what follows is a global directive, and daemon-off option is an NGINX flag that tells the service to remain in the foreground. So nginx -g "daemon-off;" is an NGINX command.
For this basic deployment, on the Integration tab, click Add Port Mapping (Figure 2) and configure the following:
-
Host Port: 8080
-
Container Port: 80
Figure 2
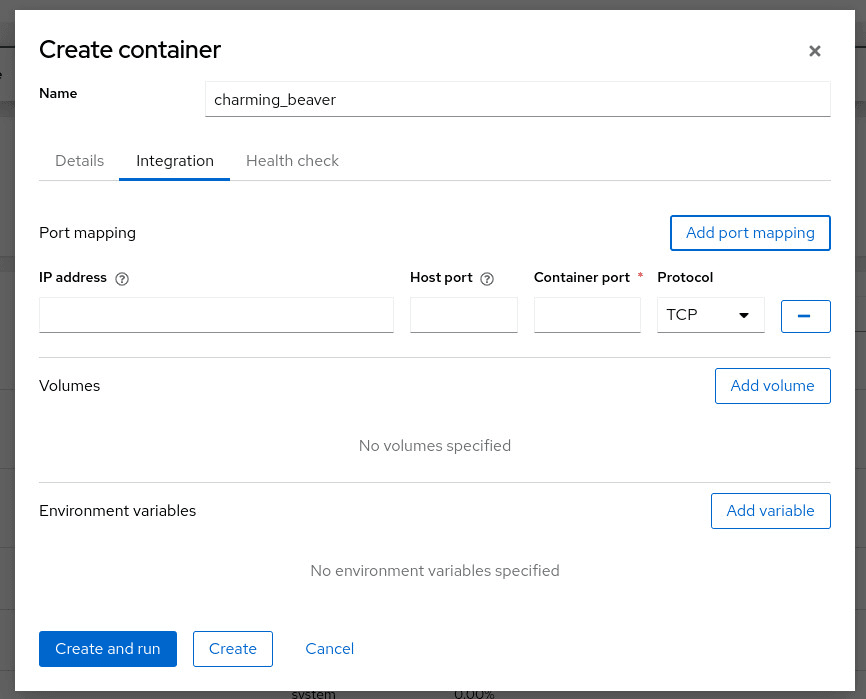
The integration tab for container deployment via Cockpit.
Once you've configured the Integration tab, click Create And Run to deploy the container. You should see the container listed as running. You can expand the entry to see more details (Figure 3).
Figure 3
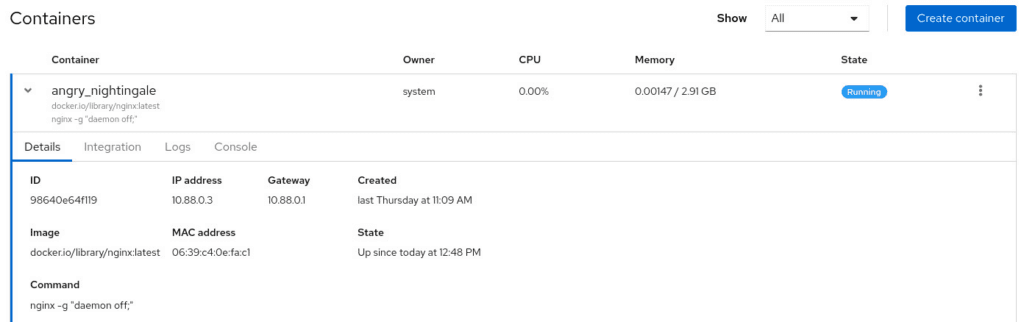
Our NGINX container was successfully deployed.
Deploy a container with persistent storage
Now, we'll deploy a MongoDB container using persistent storage. To do this, first create a new directory on the hosting Rocky Linux server with the command:
sudo mkdir /srv/data
The new directory will house the data on the hosting server. We'll deploy the NGINX container such that it mounts /srv/data to the MongoDB data within the container, which is /data/db.
Create the new container as you did above (only using the mongo image in place of nginx) but in the Integrations tab, click Add Volume. In the resulting section (Figure 4), select /srv from the Host past drop-down and then click the drop-down again to select /srv/data. In the Container Path field, type /data/db.
Figure 4
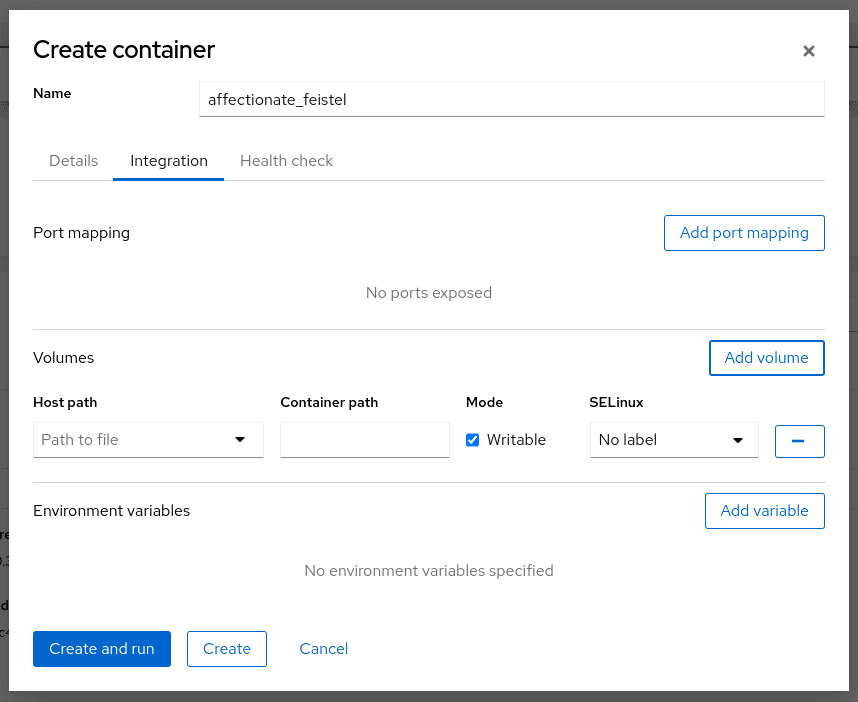
The Add Volume section in the Integrations tab.
Click Create and Run to deploy the new container.
At this point, your MongoDB container is running and data is being saved to the persistent volume /srv/data/. Should anything go wrong with the database, you'll still have access to the data from the /srv/data/ directory.
And that's the basics of using Cockpit to deploy Podman containers on Rocky Linux.
Built for Scale. Chosen by the World’s Best.
1.4M+
Rocky Linux instances
Being used world wide
90%
Of fortune 100 companies
Use CIQ supported technologies
250k
Avg. monthly downloads
Rocky Linux


