5 min read
Ascender Migrates Host From CentOS 7 To Rocky 8

With the impending sunset of CentOS, there are a lot of old CentOS 7 hosts that need to be migrated. Thankfully, our friends over at Alma Linux have created the awesome migration tool ELevate that will convert a CentOS box to a myriad of different OSes. In this article, I’ll show you how to utilize Ansible and Ascender to automate the migration process, but not only will I do migrations, I’ll also utilize VMware snapshots to ensure everything goes smoothly, and if it doesn’t, I rollback to a known good state!
Warning: The more complex a CentOS 7 system is (more exotic packages or customization), the greater the likelihood the ELevate system will fail. This is much more suited for simple systems. This is why I created the workflow using VM Snapshots with rollback capabilities. If something goes astray, I can always revert to a working state.
Video Demo
https://www.youtube.com/watch?v=TNAVxufJZx4
Playbooks
All of my playbooks can be found here: https://github.com/gregsowell/ascender-centos7-to-rocky-elevate.
I’ll start by reviewing the main playbook doing all the work centos7-to-rocky-elevate.yml. I’m going to break it up into pieces to make it easier to understand. (I’ll pick out the interesting pieces to talk about).
---
- name: Use elevate to migrate a centos7 host to rocky8
  hosts: all
  gather_facts: false
  become: true
  vars:

  tasks:
  - name: quick check if all hosts was specified with no limit
    ansible.builtin.assert:
      that: ansible_play_hosts_all|length < groups.all|length
      fail_msg: '[ERROR] All hosts not allowed.'
    run_once: true
In the above, I’m setting “become: true”. This will make all of the following tasks sudo their commands, as virtually each one will be making high-level changes.
The first task here is designed to ensure that the limit option is used to prevent a run against an entire inventory.
  - name: Update current centos7 packages
    ansible.builtin.yum:
      name: '*'
      state: latest
    register: cent_update

  - name: Reboot if updates were made
    ansible.builtin.reboot:
      reboot_timeout: 3600
    when: cent_update.changed
The above two tasks run updates on all CentOS 7 packages, then reboots if changes were made.
  - name: Grab current os version
    ansible.builtin.shell: cat /etc/os-release | grep PRETTY_NAME
    register: ver_pre

#    ansible.builtin.shell: yum install -y http://repo.almalinux.org/elevate/elevate-release-latest-el$(rpm --eval %rhel).noarch.rpm
  - name: Install elevate
    ansible.builtin.yum:
      name: http://repo.almalinux.org/elevate/elevate-release-latest-el7.noarch.rpm
      state: latest

  - name: Install leap packages for general and rocky
    ansible.builtin.yum:
      name:
        - leapp-upgrade
        - leapp-data-rocky
      state: latest
The first task here grabs the current version of CentOS (this is just used at the very end to show the starting position of the OS).
Next the ELevate package is installed.
The last task installs the general leapp package, and then the specific Rocky packages. It uses these to figure out what needs to be adjusted on the host.
  - name: run the leapp preupgrade
    ansible.builtin.shell: leapp preupgrade
    register: leapp_preupgrade
    failed_when: '"END OF REPORT" not in leapp_preupgrade.stdout'

  - name: Build fix command list based on preupgrade file recommendations
    ansible.builtin.shell: cat /var/log/leapp/leapp-report.txt | grep -F [command] | awk '{$1= ""; print $0}'
    register: fix_commands

  - name: Run standard preupgrade fixes
    ansible.builtin.shell: "{{ item }}"
    loop:
      - rmmod pata_acpi
      - echo PermitRootLogin yes | tee -a /etc/ssh/sshd_config
#      - leapp answer --section remove_pam_pkcs11_module_check.confirm=True

  - name: Run gathered preupgrade fixes
    ansible.builtin.shell: "{{ item }}"
    loop: "{{ fix_commands.stdout_lines }}"
These four tasks are important ones. First, we run the leapp app with the preupgrade option. This causes leapp to do the evaluation, which will eventually produce a report with warnings and recommendations. Be patient, as this task takes a while to complete.
The next task parses the previously mentioned report file and finds any entries listed as “[command]”. These are commands that leapp recommends us run to help with the final transition upgrade. Note: The report should technically be evaluated for each system, understood, and confidently used to make adjustments. What I’m doing is trying to automate a process that is difficult to do so, so I take all of the recommendations.
Next, I run the recommended CentOS 7 options from the guide.
Last here, I take the commands parsed from the preupgrade report and apply all of them.
  - name: Run the leapp upgrade
    ansible.builtin.shell: leapp upgrade

  - name: Reboot to complete upgrade
    ansible.builtin.reboot:
      reboot_timeout: 1200
I now run the leapp upgrade command. This will take close to ten minutes to complete.
Once it is done, a reboot is issued on the system. It will process the changes, then reboot, process some more, reboot, etc. This process will take something close to five minutes.
  - name: set new python interpreter
    ansible.builtin.set_fact:
      ansible_python_interpreter: /usr/bin/python3

  - name: Grab current os version
    ansible.builtin.shell: cat /etc/os-release | grep PRETTY_NAME
    register: ver_post

  - name: Display before and after versions
    ansible.builtin.debug:
      msg: "Version before {{ ver_pre.stdout | regex_replace('PRETTY_NAME=','')}}.  Version after {{ ver_post.stdout | regex_replace('PRETTY_NAME=','')}}."
I found once upgrading from CentOS 7 to Rocky 8, I had to adjust the interpreter variable here, which is what I’m doing in this first task.
Next, I grab the current OS.
Lastly, I display a simple message showing what the before version was, and what the upgraded OS shows up as.
Configure/Launch Ascender
I’m not going to cover adding inventories, projects, credentials, and job templates as I’ve covered this in this quick-start blog post.
I’m going to create my workflow; it’s assumed all of your job templates have been created. A workflow is a method to visually create a map of job templates that will run sequentially.
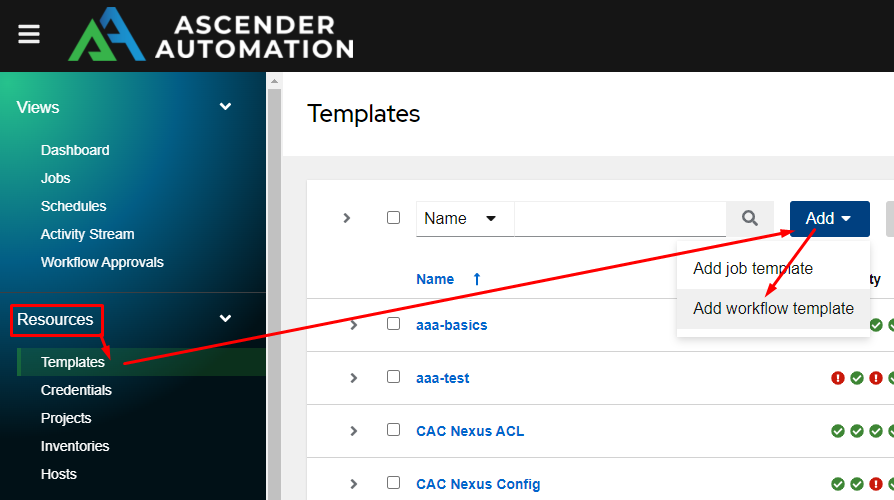
Start by clicking Resources, Templates, Add, and Add workflow template:
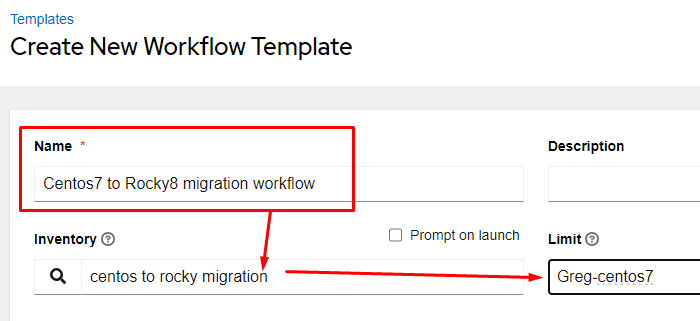
Fill out the Name, Inventory, and Limit options as below:
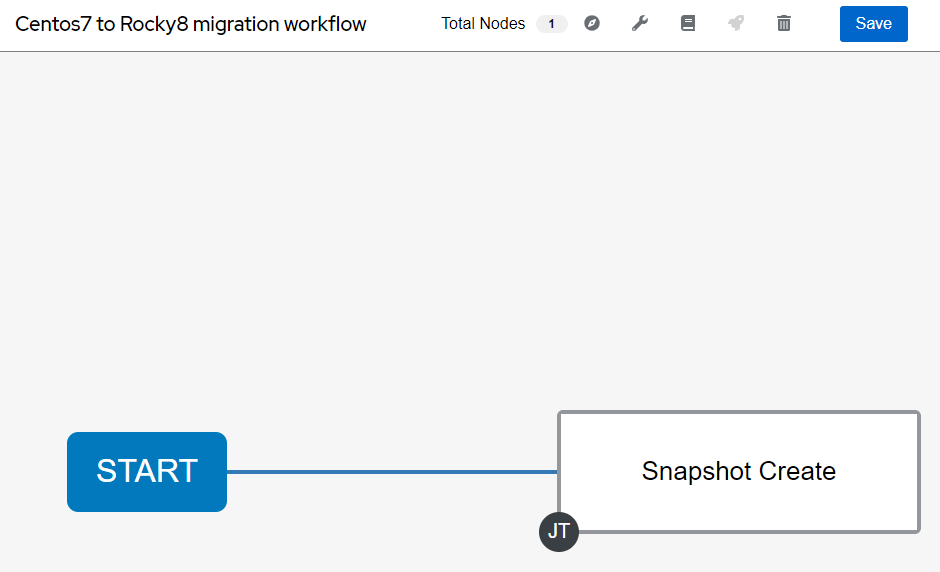
This will automatically take me into the workflow visualizer:

I’ll then click start, which takes me into the add node screen. In here, I’ll choose my VM snapshot job template and create a node alias that is more user friendly:

I’ll now hover over Snapshot Create and choose the + symbol to add the next On Success step:
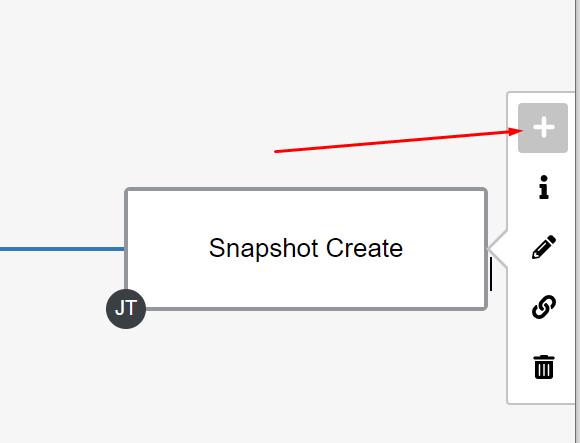
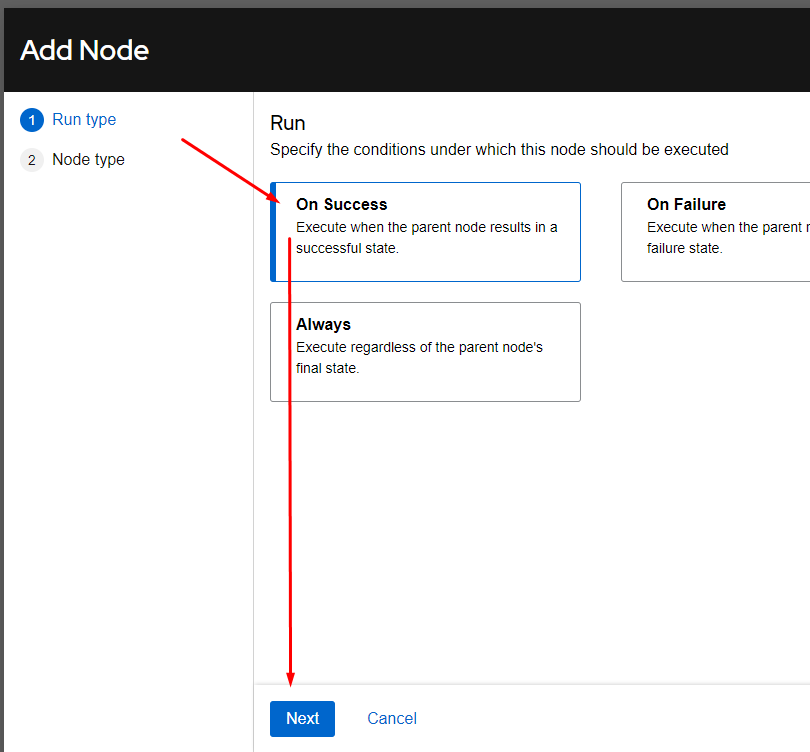
I’ll choose On Success and click next:
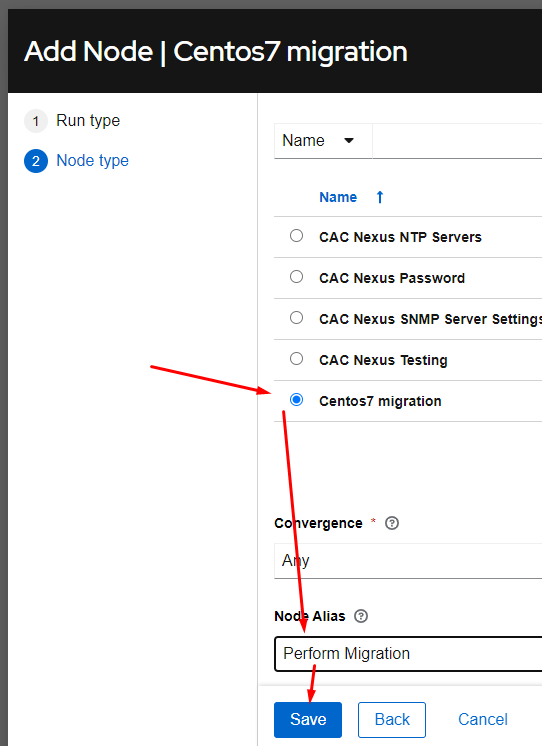
I’ll then choose the migration job template, give it another friendly alias, and click save:
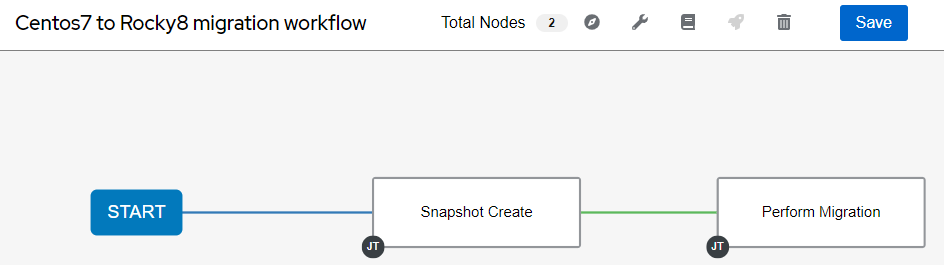
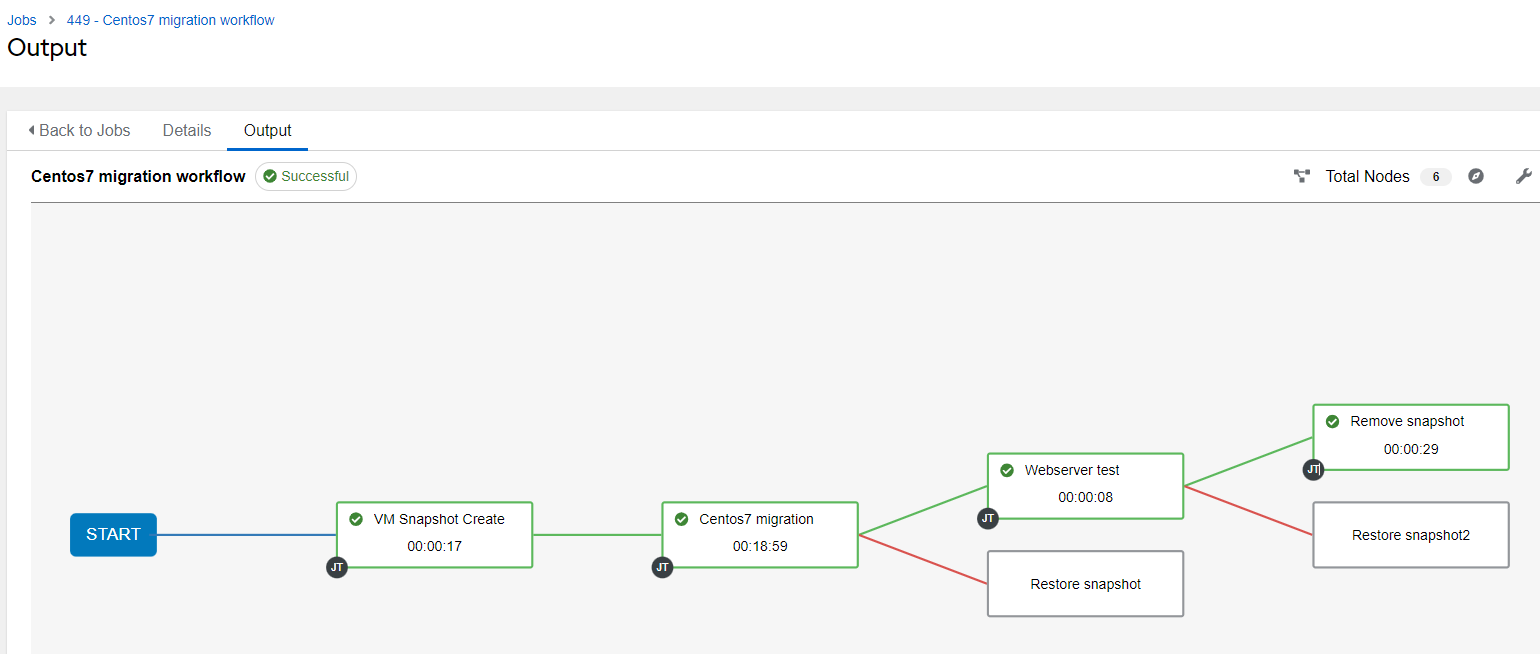
I’ll continue on until I have the completed workflow, then I’ll click save:

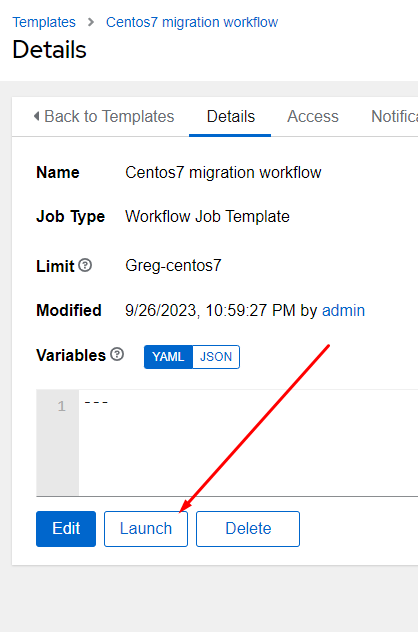
I can now launch the workflow job template:
It will then send me to the job menu directly on the running workflow:
Conclusion
This is a convenient way to test migrating various CentOS 7 systems inside your infrastructure. I’m keen to hear about your experiences trying this out, so don’t be shy. If you are looking for world-class support for our Ascender product, please give us a shout. Thanks and happy automating!
Built for scale. Chosen by the world’s best.
2.75M+
Rocky Linux instances
Being used world wide
90%
Of fortune 100 companies
Use CIQ supported technologies
250k
Avg. monthly downloads
Rocky Linux


