An Introduction to the Rocky Linux Firewall

It's well known that Linux is a very secure operating system. That's one of the many reasons why so many businesses depend on Linux and open source software. But, as any experienced admin will tell you, as long as a computer is connected to a network, it's not 100% safe. Some will even argue the same point if the machine isn't connected to a network. Of course, we're not talking about an air-gapped system but one that's plugged into a network and can reach the internet, and can be reached by either your LAN or WAN.
If Rocky Linux is your operating system of choice for servers, you'll be glad to know there's a powerful, built-in firewall that isn't nearly as complicated as you might think. Even better, there's a handy GUI you can install to make administering your firewall even easier.
First, let's take an introductory look into using the command-line version of the firewall. Then we'll install the GUI and see how it works.
What you'll need
The only things you'll need for this are a running instance of Rocky Linux and a user with sudo privileges. If you installed Rocky Linux without a desktop environment, you'll be limited to the command-line option.
With those two things at the ready, let's explore.
Enabling the firewall
First, you'll want to check the status of your firewall (to make sure it's running). Log into Rocky Linux and open a terminal window. With the terminal window open, issue the command:
sudo systemctl status firewalld
When enabled and started, you should see output like the following:
● firewalld.service - firewalld - dynamic firewall daemon

Loaded: loaded (/usr/lib/systemd/system/firewalld.service; enabled; vendor preset: enabled)

     Active: active (running) since Wed 2023-04-19 03:40:31 UTC; 1 month 19 days ago
If you see active (running) in the output, you're good to go. If you see stopped, you must start the firewalld service with the command:
sudo systemctl start firewalld
The state should now be listed as running.
In order to configure the firewalld service to start when the system boots, ensure the service is enabled by typing:
sudo systemctl enable firewalld
You can also enable and start the service in one step by adding the --now flag:
sudo systemctl enable --now firewalld
List the active firewall rules
The next thing you'll want to do is view the currently configured firewall rules, which can be done with the command:
sudo firewall-cmd --list-all
You should see something like this in the output:
target: default

icmp-block-inversion: no

interfaces: enp0s3

sources:

services: cockpit dhcpv6-client ssh

ports: 67/udp

protocols:

forward: no

masquerade: no

forward-ports:

source-ports:

icmp-blocks:

rich rules:
Next, you'll want to view a list of services that are allowed through the firewall with the command:
sudo firewall-cmd --list-services
The output should list something like:
ockpit dhcpv6-client ssh
The above output indicates the Cockpit, dhcpv6, and ssh services are all being allowed through the firewall. If you want to view that list by way of port numbers instead, the command is:
sudo firewall-cmd --list-ports
The output will look something like this:
67/udp
Let's allow HTTP port 80 through the firewall.
How to allow a service through the firewall
Since a lot of people use Rocky Linux as a web server, let's allow port 80 through. One thing to keep in mind is that firewalld works with zones. Each zone is assigned to a network interface, so you get better control. For example, you might have a private zone that only your LAN can access, and you might have a public zone that allows external WAN traffic access. Given we're talking about HTTP, we'll assume you want to open port 80 to the public zone.
There are nine different zones, but you really only need to concern yourself with four:
-
public - This represents public, untrusted networks.
-
home - This is an environment wherein you can trust most of the computers and services attached to it.
-
work - This is an environment that offers the same level of trust as home but is used for machines on a business LAN.
-
trusted - This is where you can trust all of the machines and services attached to the network.
We're going to work with the public zone.
To allow HTTP (port 80) through the firewall on the public zone, let's first make sure we're working with the correct zone with the command:
firewall-cmd --get-default-zone
You should see public in the output. If not, you can set your default zone to public with the command:
sudo firewall-cmd --set-default-zone=public
Next, view the information about active zones with the command:
firewall-cmd --get-active-zones
The output should read something like this:
public

interfaces: enp0s3
Now, let's open port 80 with the command:
sudo firewall-cmd --zone=public --add-port=80/tcp --permanent
After the above command completes, reload the firewall with the command:
sudo firewall-cmd --reload
You can then verify the port has been added with the command:
sudo firewall-cmd --list-ports
You should now see 80/tcp in the output, indicating you've successfully added the HTTP port to the firewall.
Let's make it easier.
How to install a GUI for firewalld
There's a very handy GUI for firewalld that can be installed from the standard repositories. The command to install this app is:
sudo dnf install firewall-config -y
Once the command completes, you should find a new listing in your desktop menu, labeled Firewall. Click that entry and, when prompted, type your sudo password.
The Firewall GUI is very simple to use. Let's say you want to open HTTP to the public zone. To do that, click public under zones and then click the Ports tab. In the resulting window (Figure 1), click Add.
Figure 1
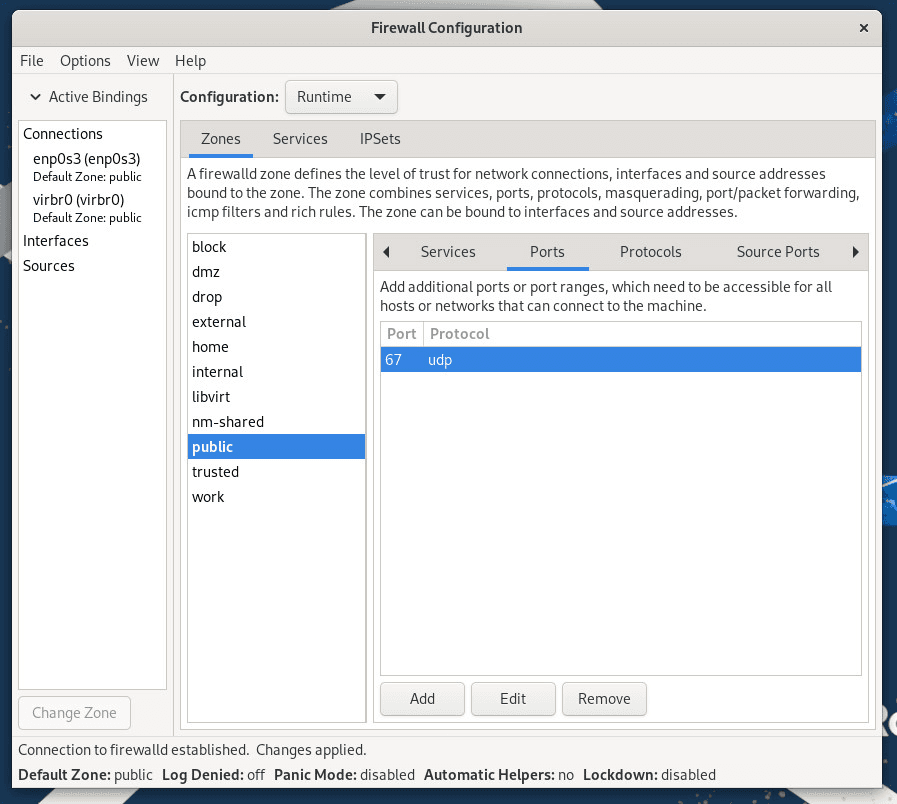
The Firewall GUI simplifies the process of managing your firewall.
In the popup (Figure 2) type the port or port range, select the correct protocol, and click OK to save it.
Figure 2
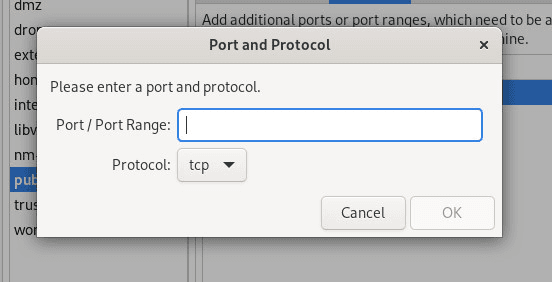
Adding a new port to the firewall.
Once you've added the port, click Options > Reload Firewalld and (when prompted) type your sudo password.
Congratulations! You've just simplified the process of adding ports to the firewall. You can go through the same process and add more ports and services as needed.
Modifying the firewall offline
In some scenarios, like when provisioning a system with a Kickstart or in an automated manner, it is possible to perform modifications to the firewall while the system is not booted and the firewalld service is not running.
Firewalld provides the firewall-offline-command which accepts the same input as firewall-cmd to fulfill this requirement, allowing you to configure the firewall rules before your server boots up and ensure your policies are enforced even before configuration management is able to be applied.


