
Azure Confidential Compute Recovery: Failed Volume Unlock or Secure Boot Violation
Contributors
Ishaan Mishra, JW Koebel
It’s happened to all of us at one point: while tweaking your system, you’ve accidentally installed a wrong kernel version, and now your system is failing to boot. This is usually a pretty quick fix, but if you’re running an Azure Confidential Compute (ACC) instance, you have two challenges. First, it’s a cloud environment, so it’s tricker to get to a console during the boot process. And second, even with console access, you may not be able to use the grub bootloader menu to just select the previous version and continue on your way.
If you’ve ended up in a situation where your ACC instance is not booting after an update due to a kernel mismatch, these instructions will help guide you through the recovery process. We’ve outlined a summary of different error scenarios on ACC in our previous article, and we expand on recovering from this error scenario below with these steps:
- Gaining console access.
- Accessing the OS disk.
- Removing the undesired kernel.
- Rebooting and post-recovery recommendations.
Your Azure user account needs to have the Virtual Machine Contributor and Disk Contributor roles to complete these steps. It’ll take around 15 minutes to complete.
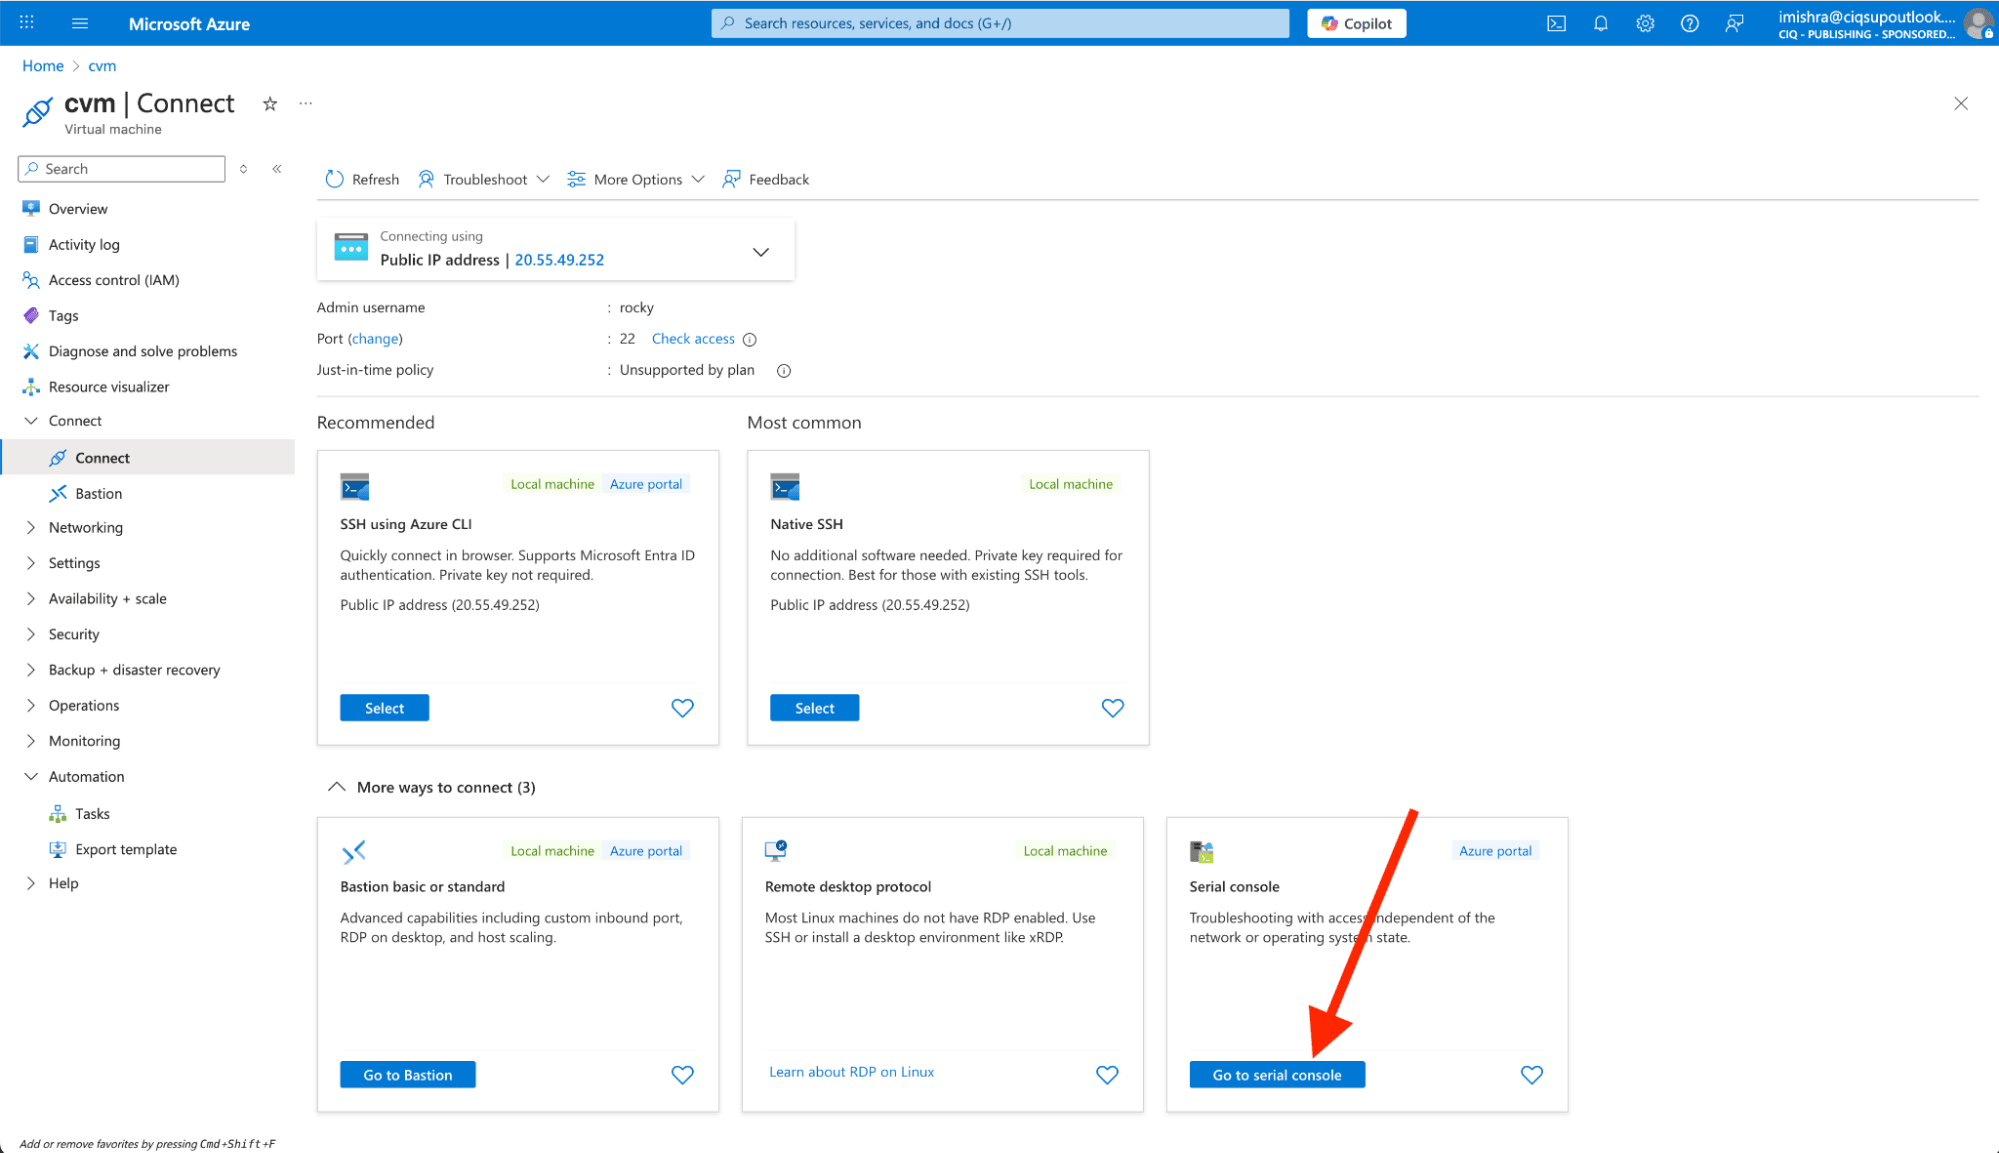
Enable and open the Azure serial console
In the Azure Portal, navigate to Virtual Machines → your CVM → Connect. Switch to Serial console.
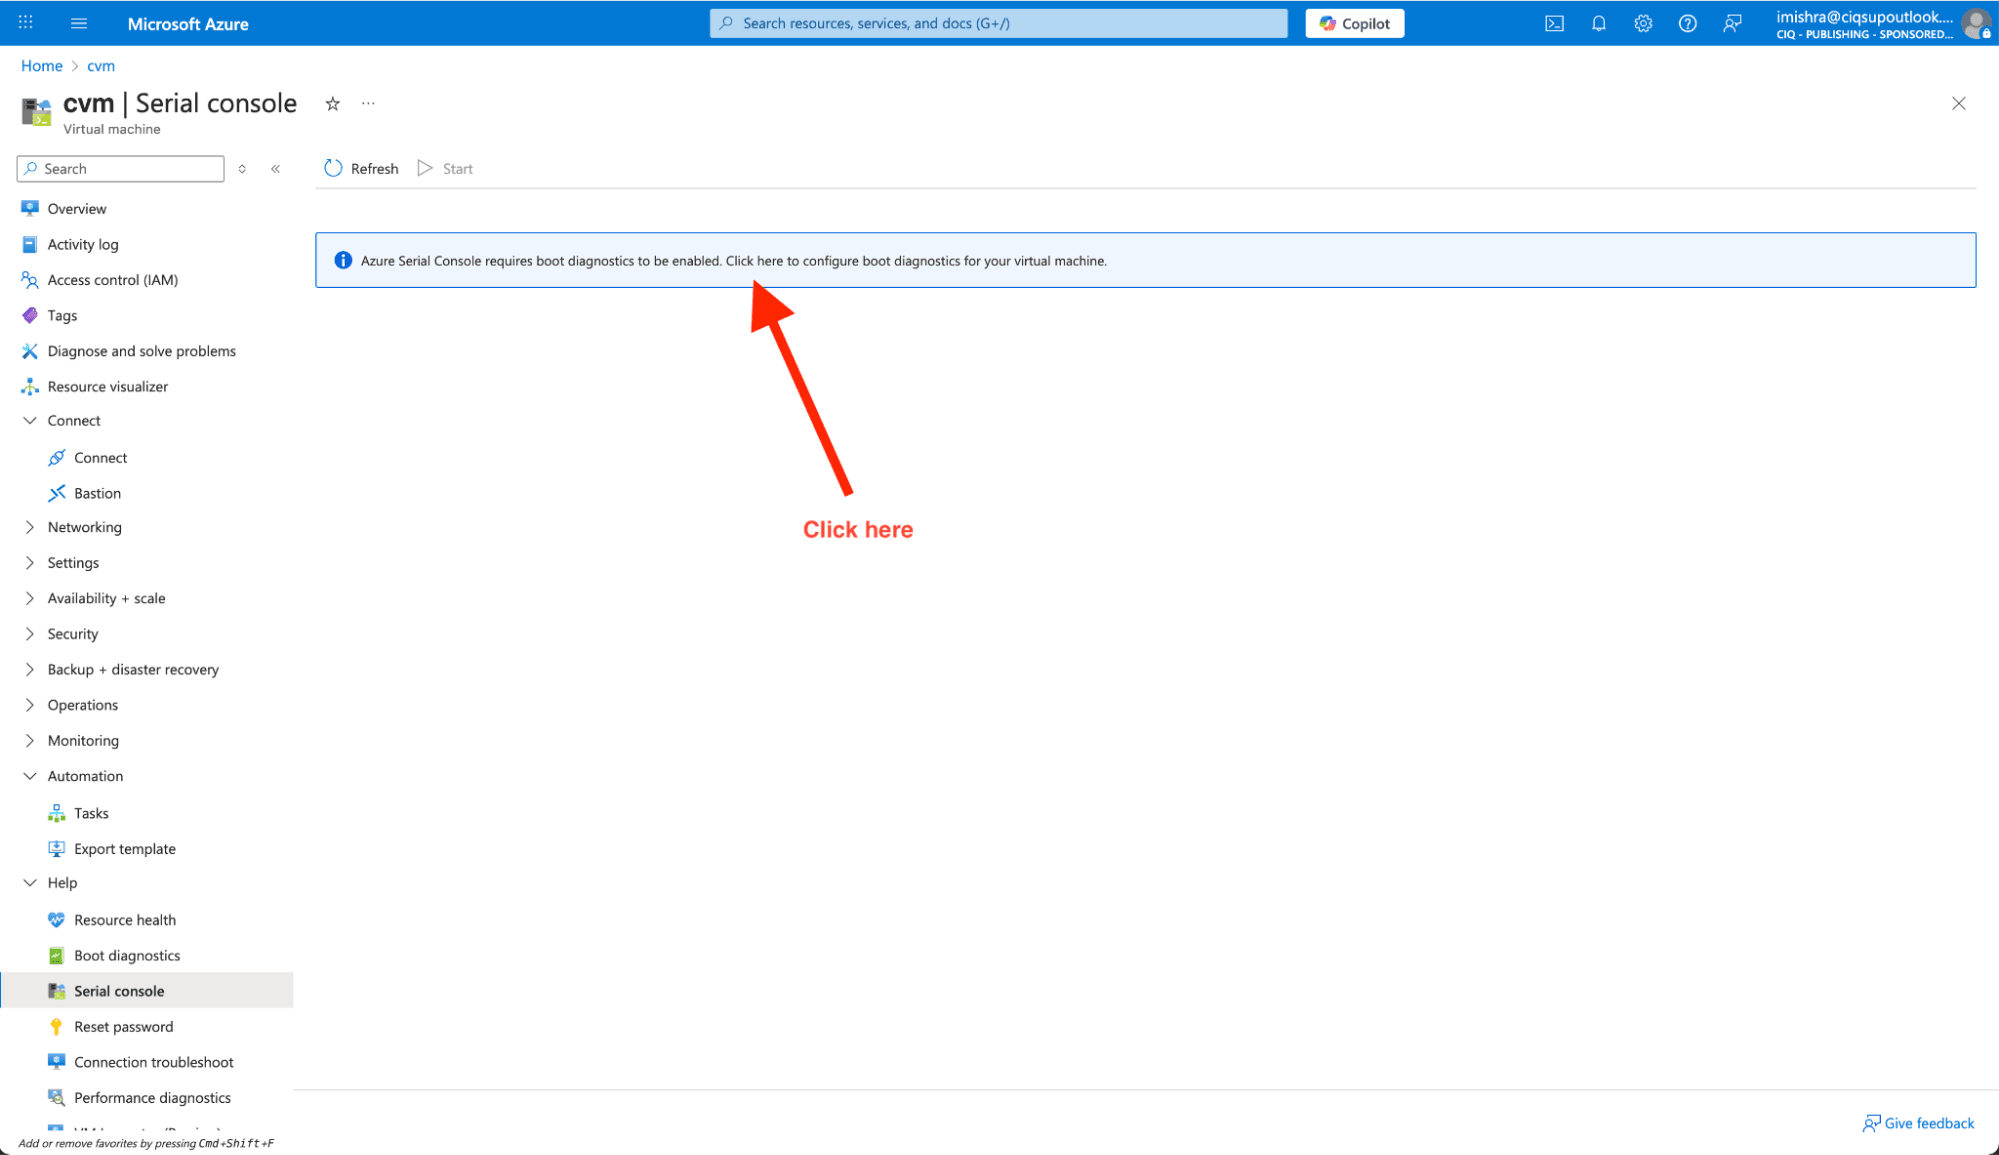
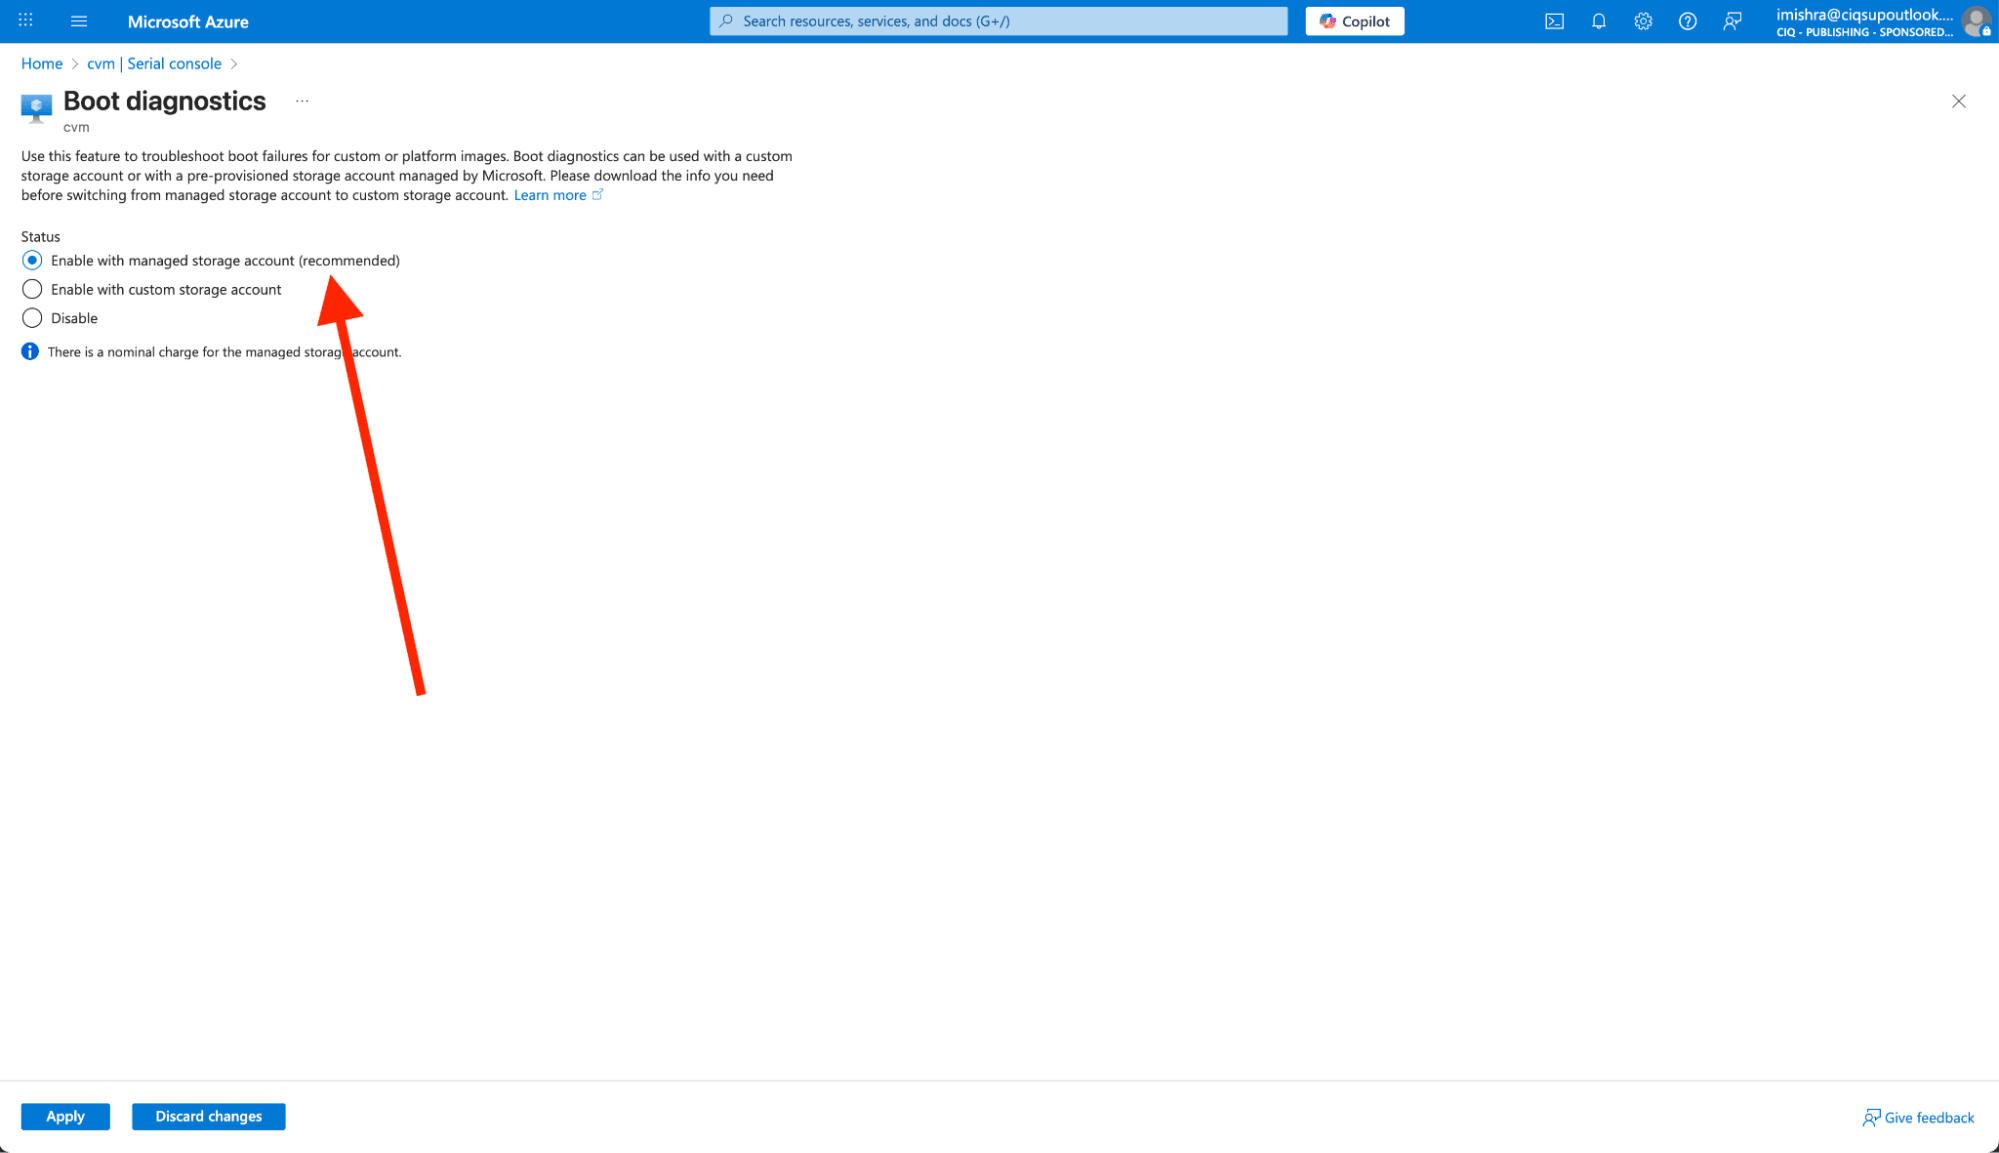
Enable Boot Diagnostics if they are disabled.
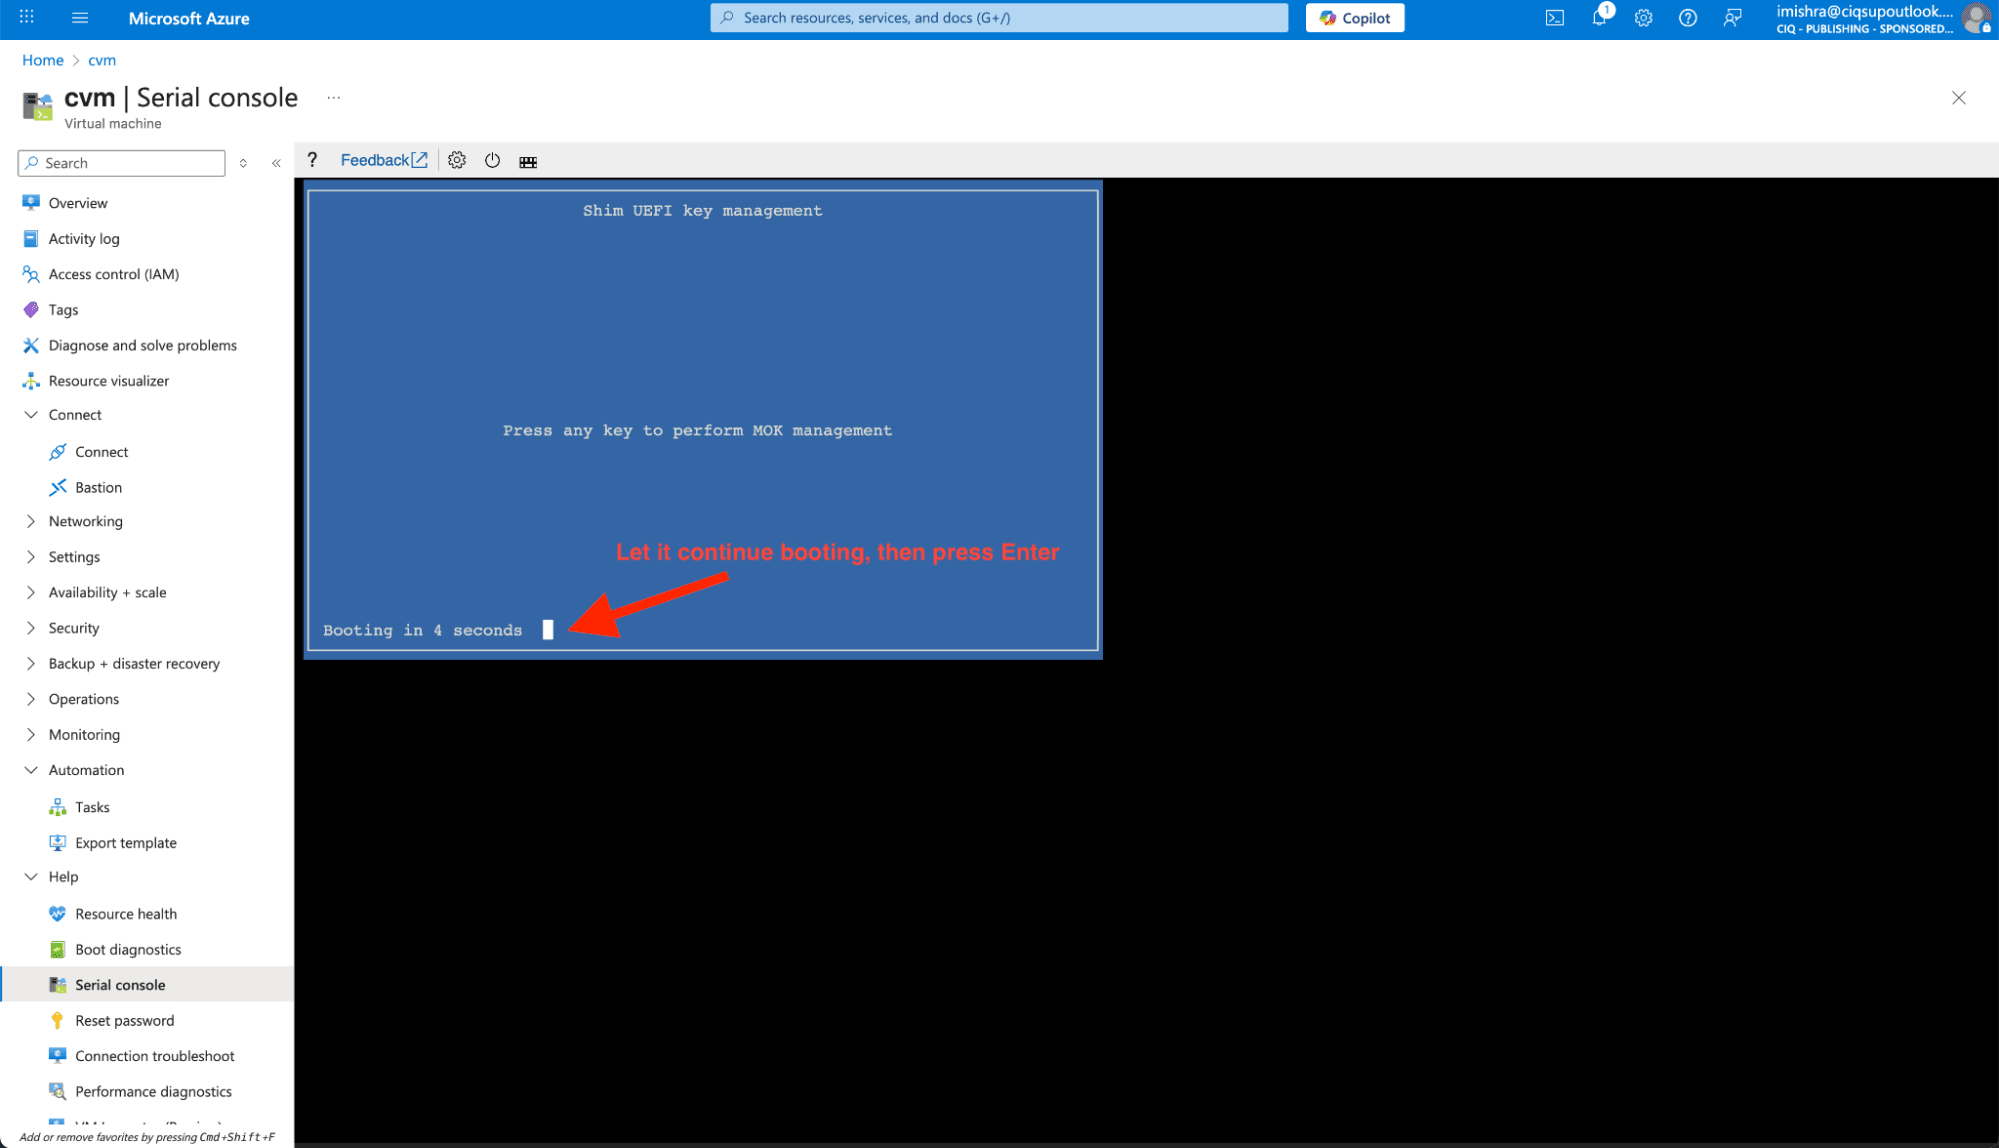
Start or restart the system and watch for the serial console output.
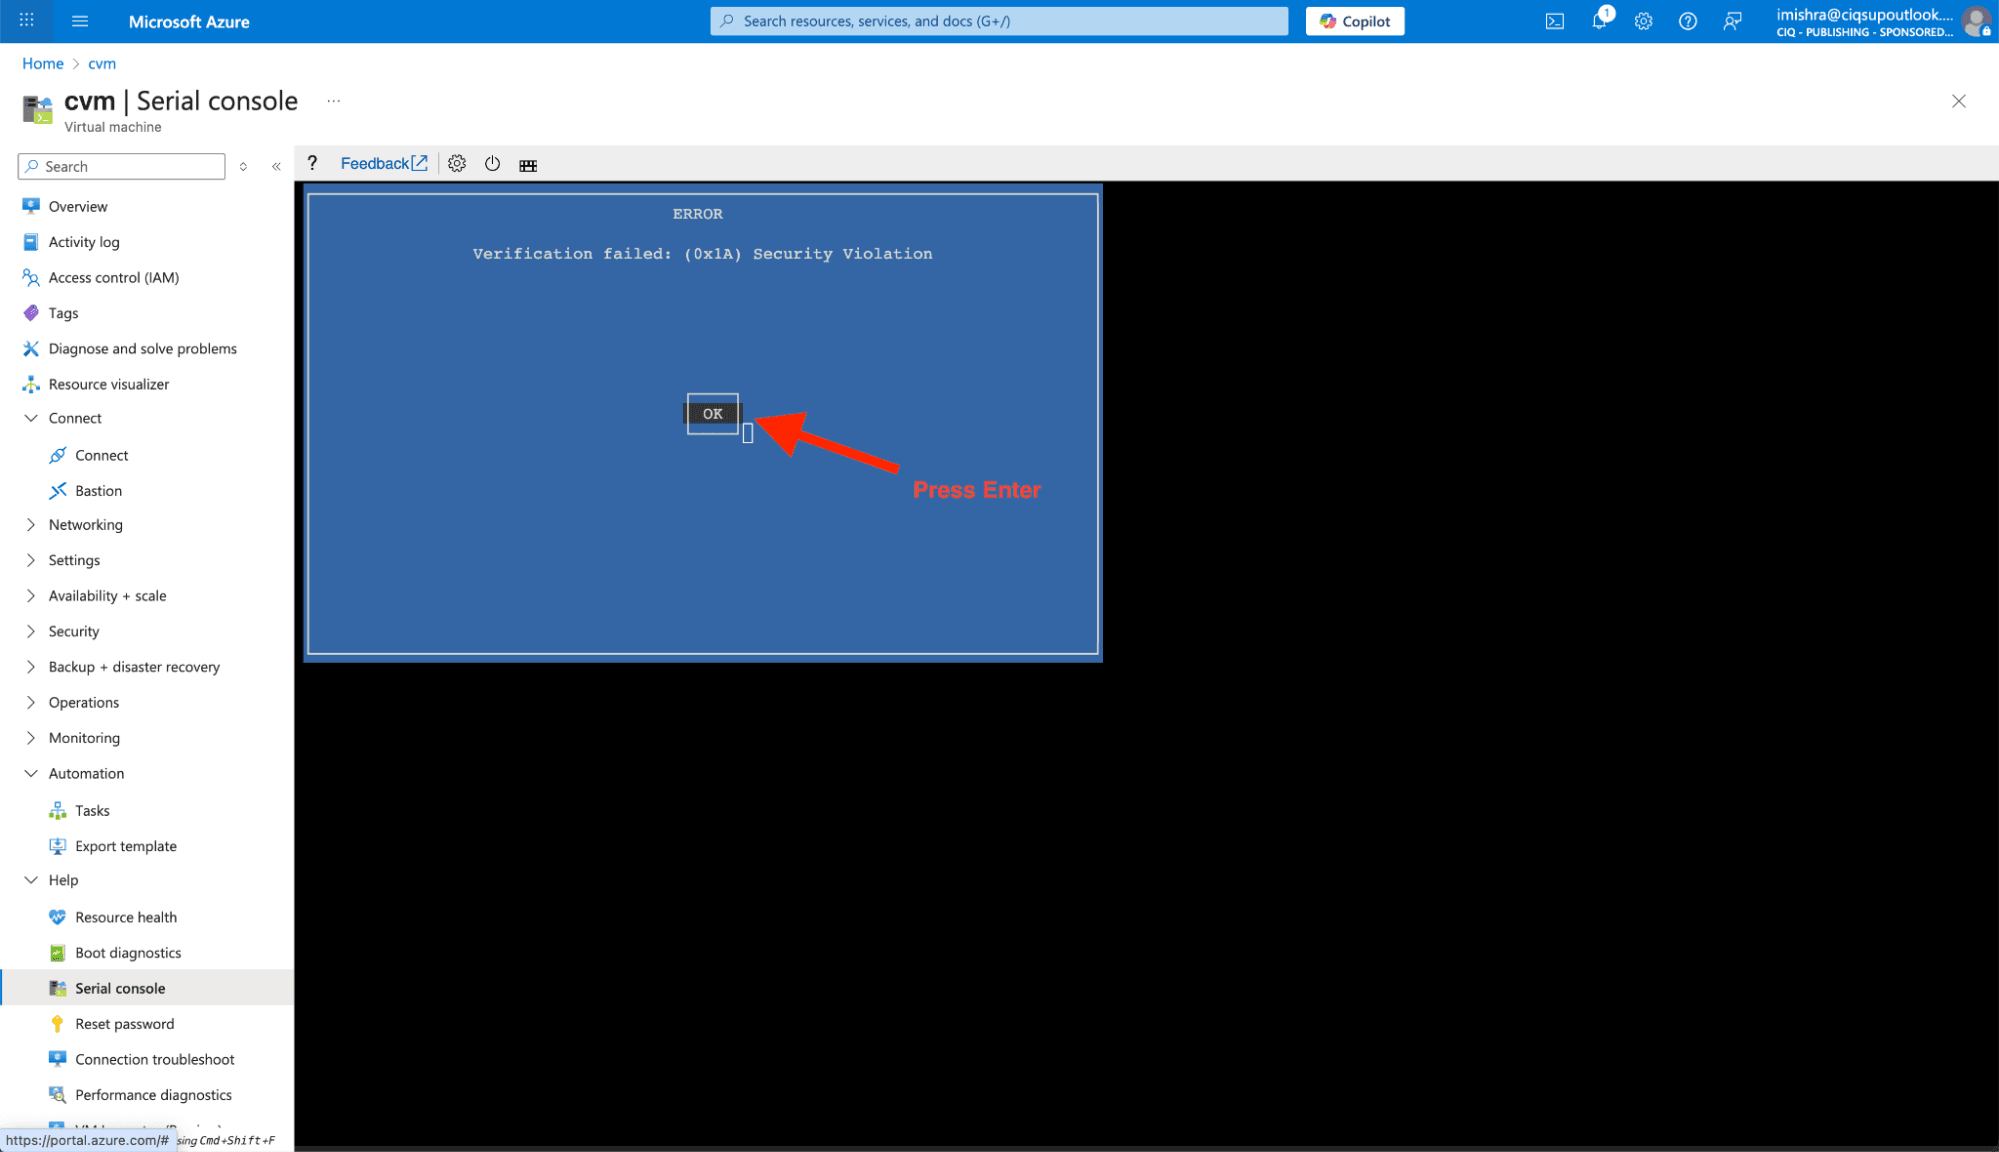
Secure Boot violation
If you’ve ended up here after an incorrect kernel update, such as installing a customized or upstream kernel which isn’t signed or is signed with a key other than expected, you’ll get a Secure Boot violation notice. The system’s UEFI firmware will present the Secure Boot Violation prompt multiple times. Press enter to “OK” the prompt, and after 2 confirmations, it will continue.
If you did not enable Confidential OS Disk Encryption on your instance at creation time, you’ll continue booting normally at this stage. SSH and any services will come online and you can login as normal and complete any tasks you need to roll back the changes you made previously. This is the easiest recovery path.
(If you’ve ended up with a boot failure due to a change in valid keys, you won’t have a Secure Boot issue specifically – skip on to the next step.)
Volume unlock failure
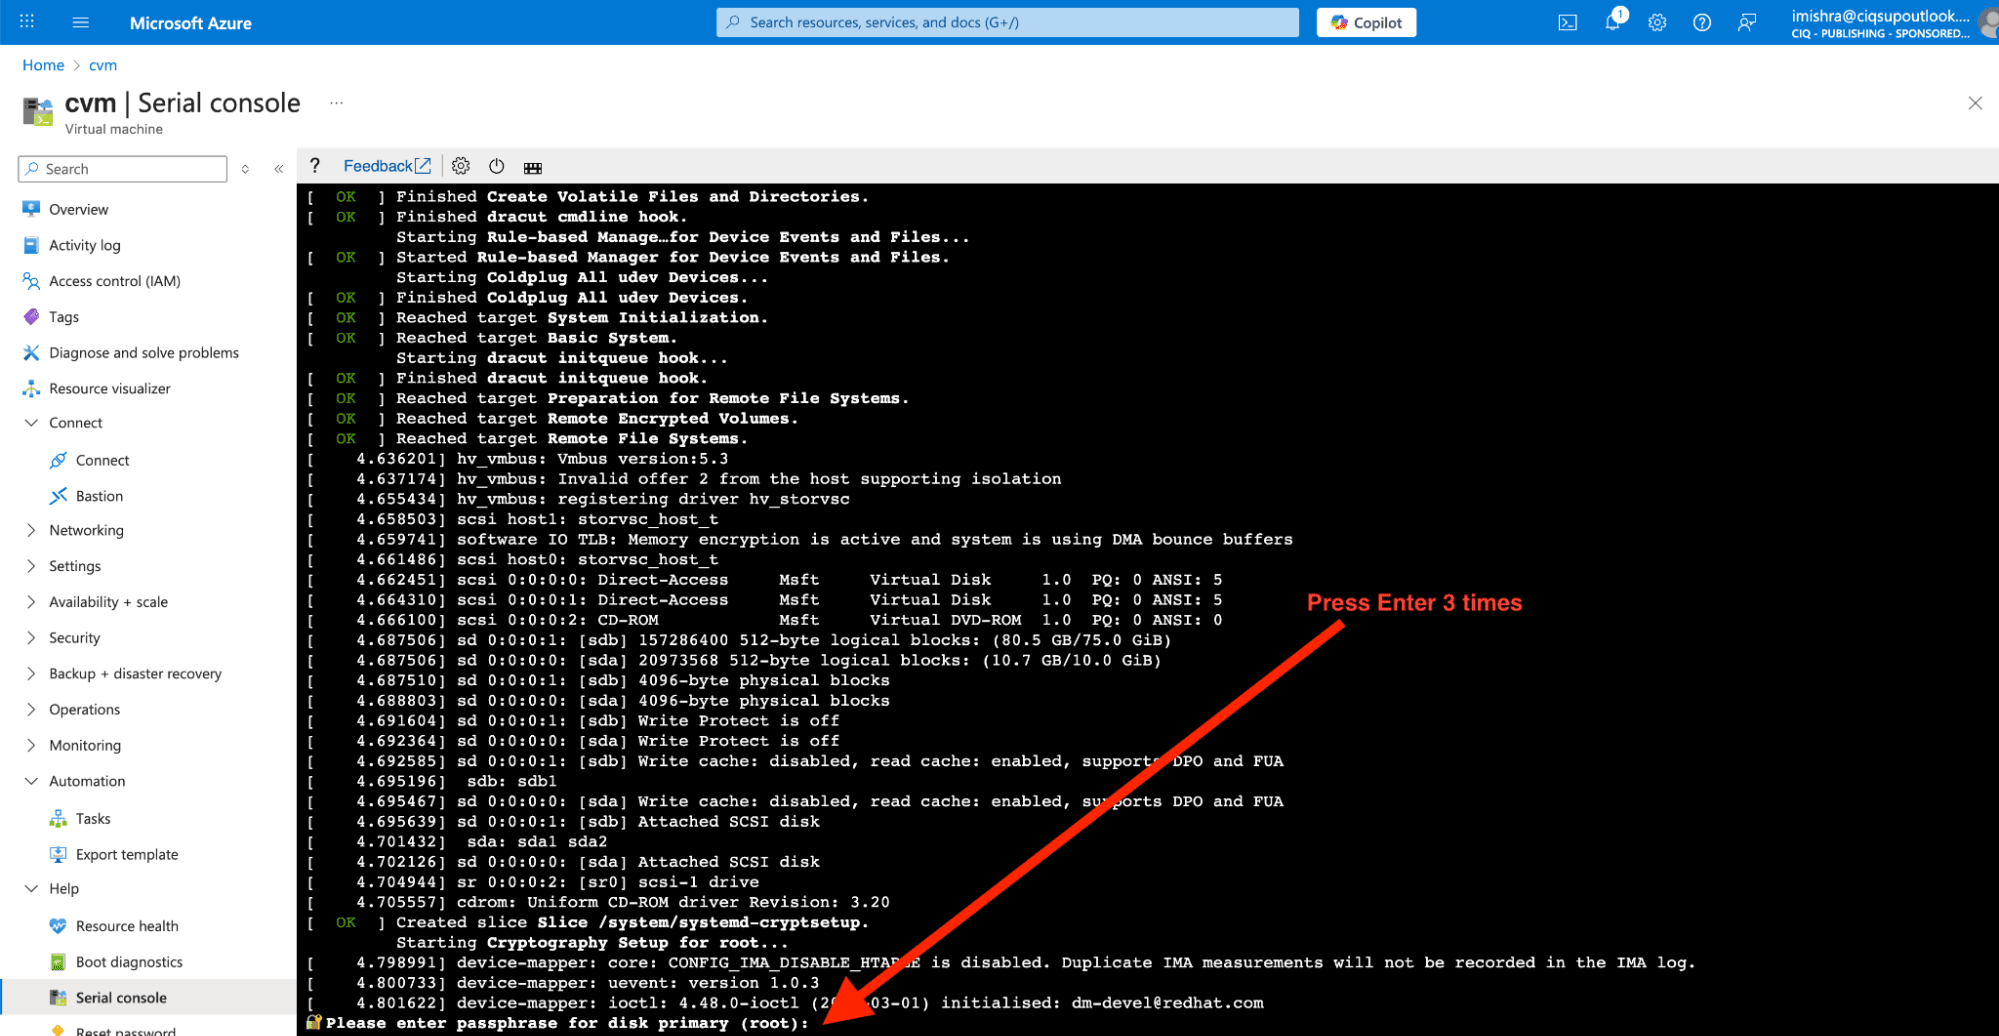
If you did select Confidential OS Disk Encryption, you’ll now be asked for the recovery passphrase.
This happens when the Platform Configuration Registers (PCRs) in the system TPM don’t match the expected values when the encryption keys were originally sealed. This would happen if you’ve switched to a kernel with a different signature (whether valid or not) or if you’ve added extra certificates which are now being read into the PCR.
If you have your recovery passphrase you created following the instructions in our previous article, you can enter it here and proceed to boot normally and roll back from within the OS - you won’t need the following steps which use the recovery shell.
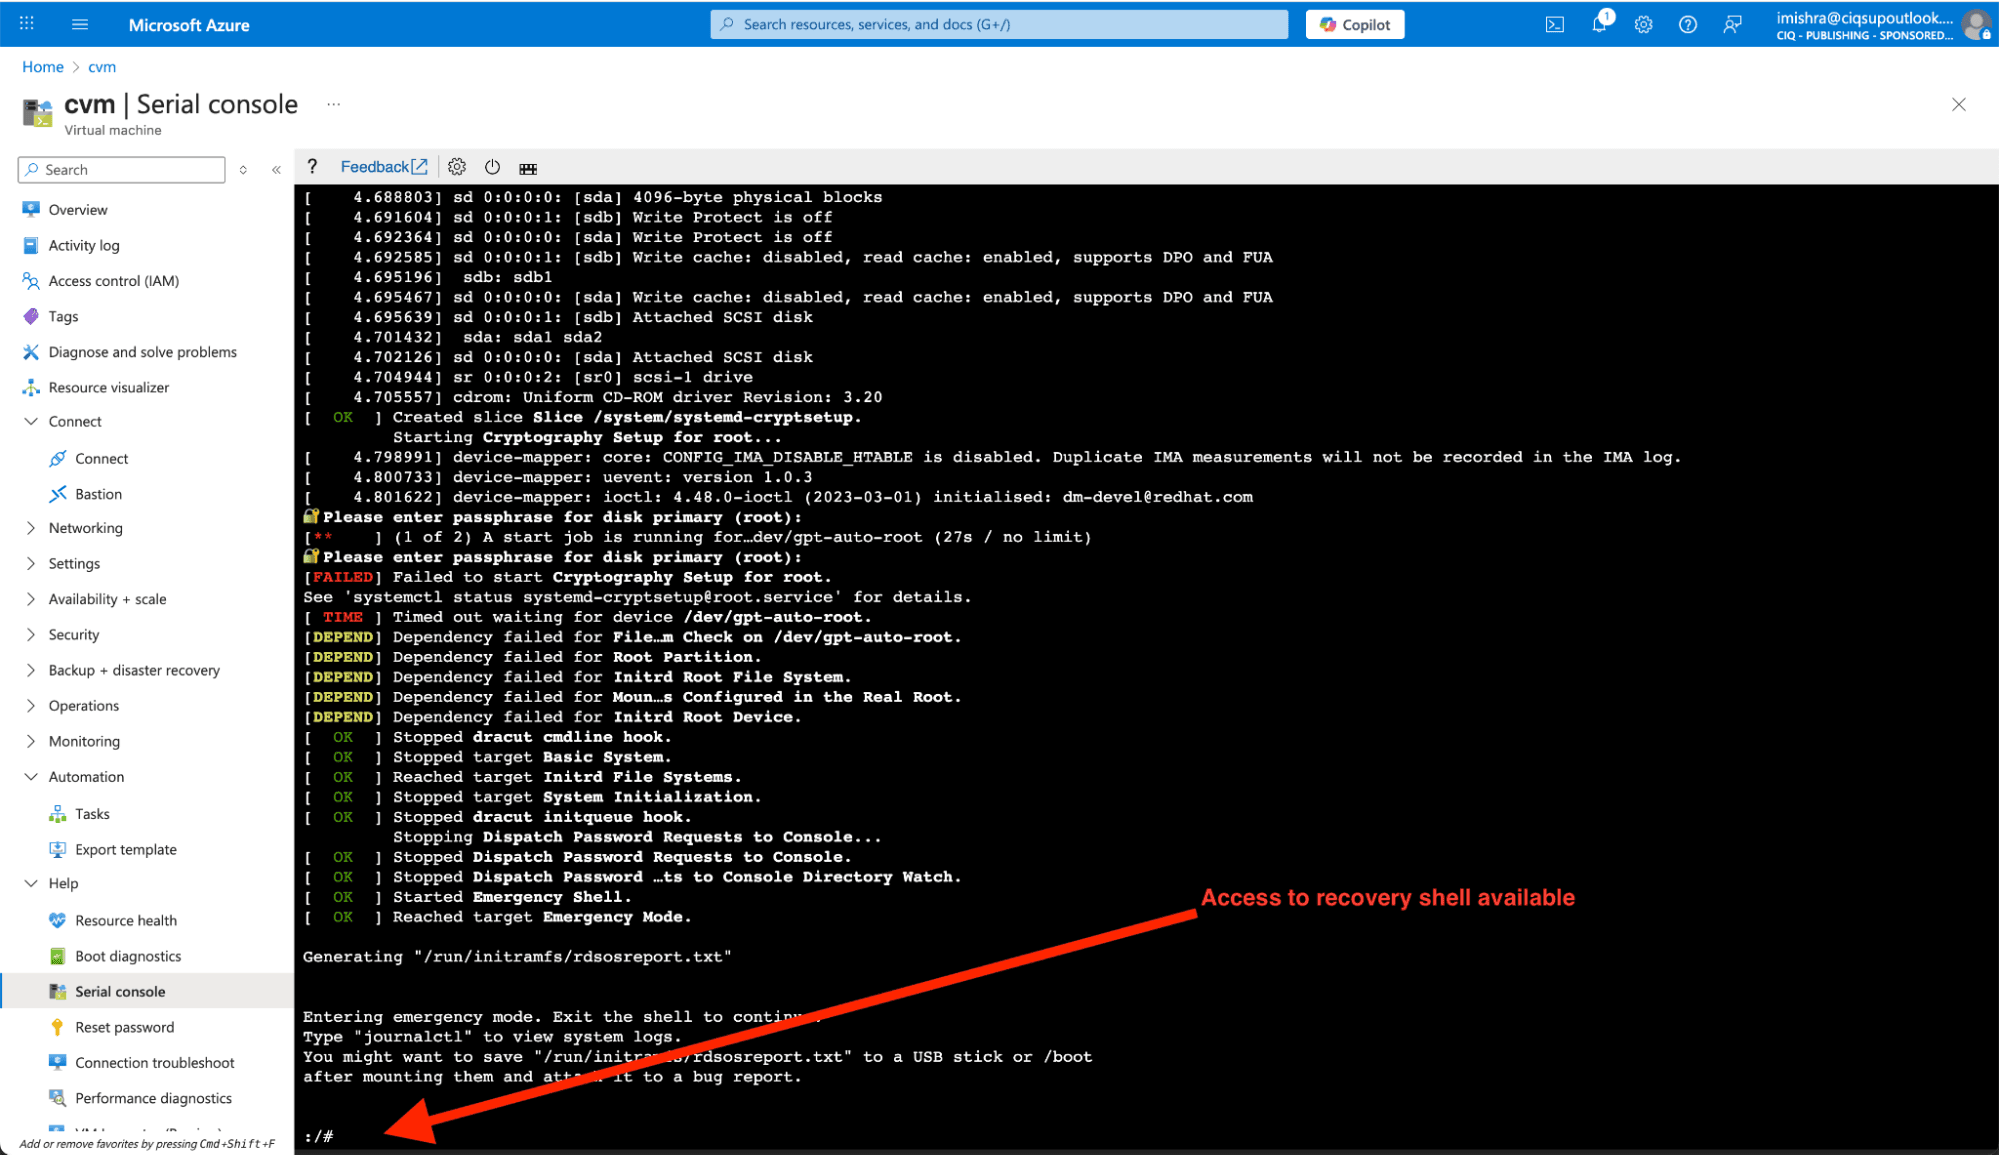
However, if you’ve found yourself at this prompt and don’t have the recovery passphrase handy, you can still proceed with recovery using the systemd emergency shell. Press enter three times and you’ll enter the recovery shell.
Give it a minute to fire up, and you’ll see the recovery shell prompt:
Mount the OS disk
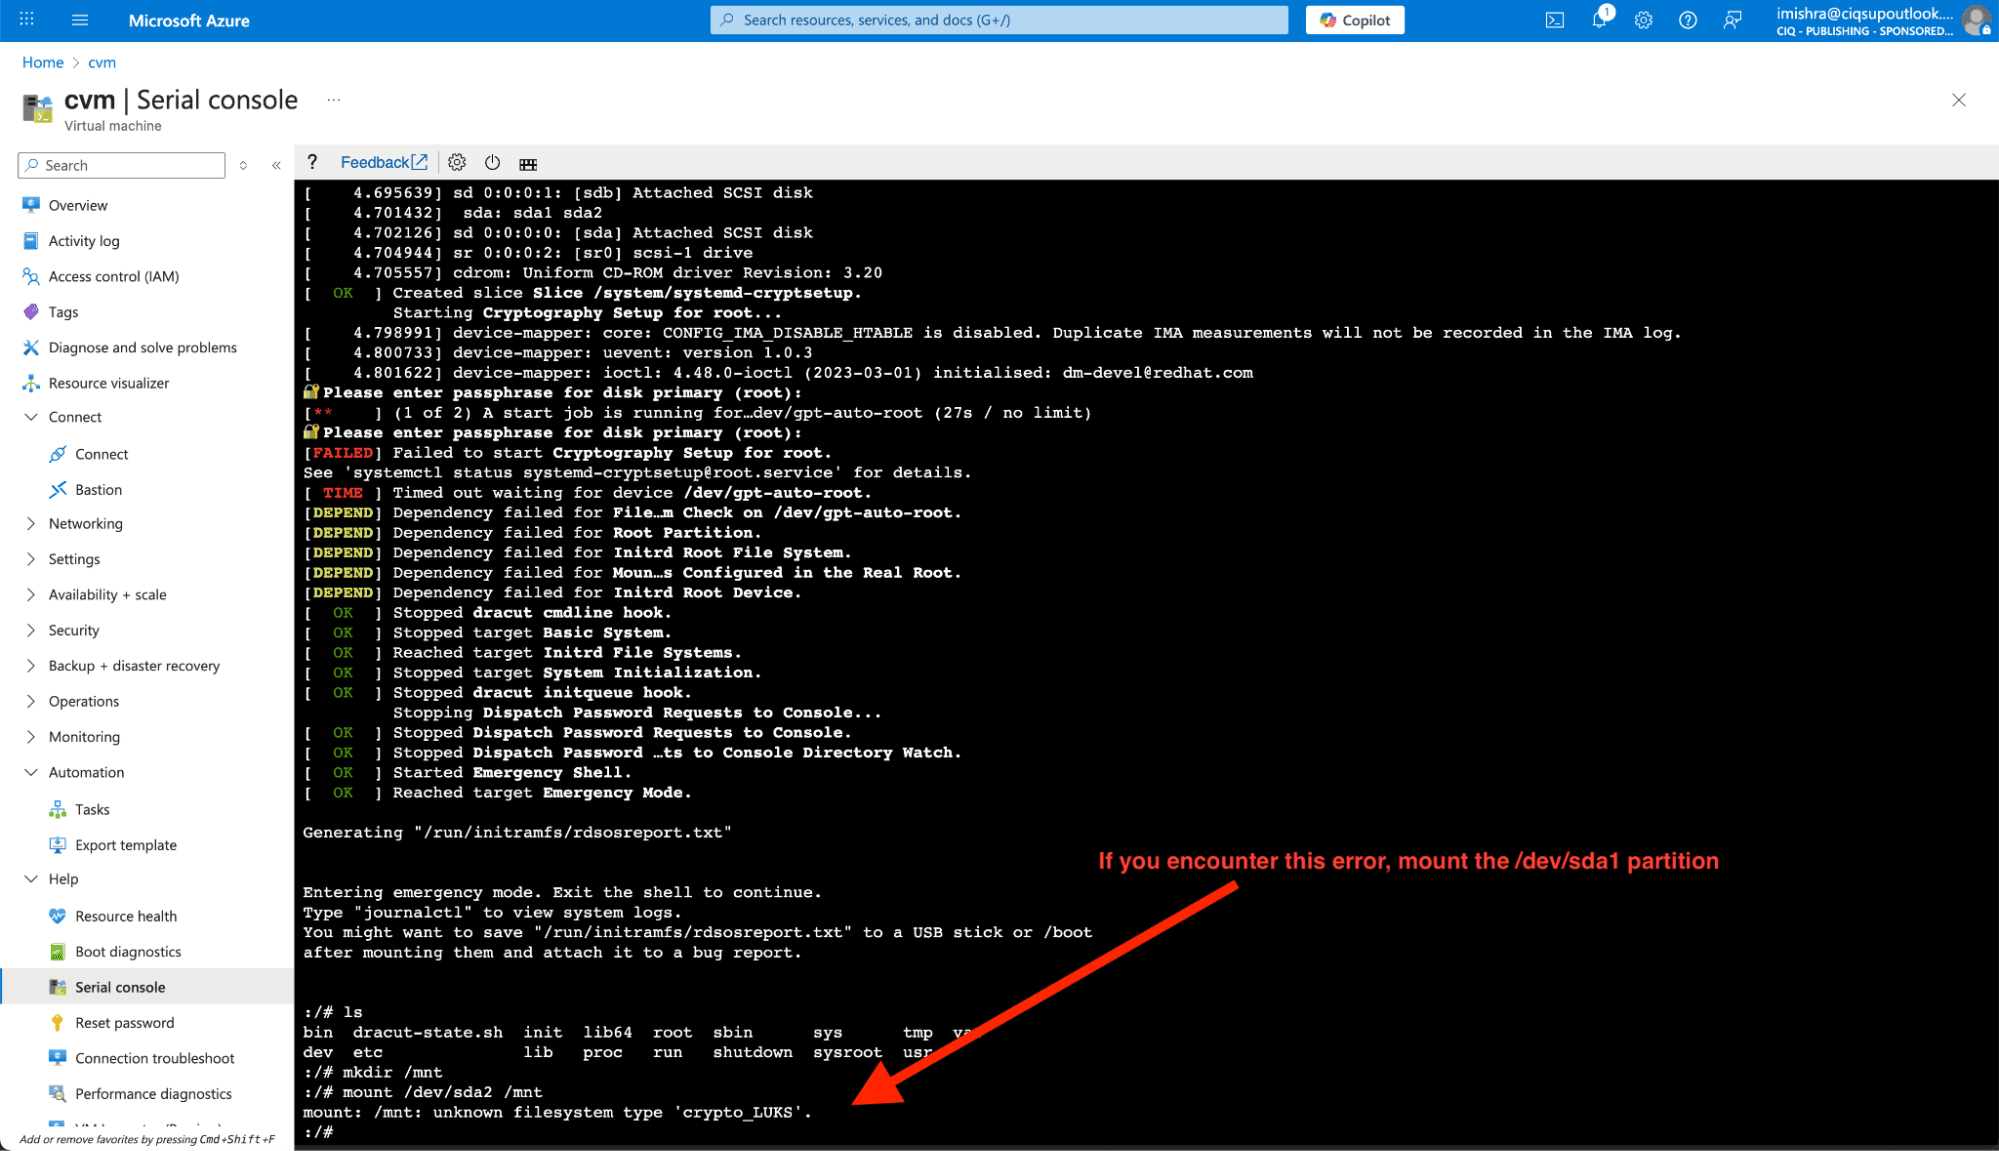
Mount the disks:
mkdir /mnt
mount /dev/sda2 /mnt
If /dev/sda2 throws an error like "unknown filesystem type 'crypto_LUKS'.", then use /dev/sda1 instead.
mount /dev/sda1 /mnt
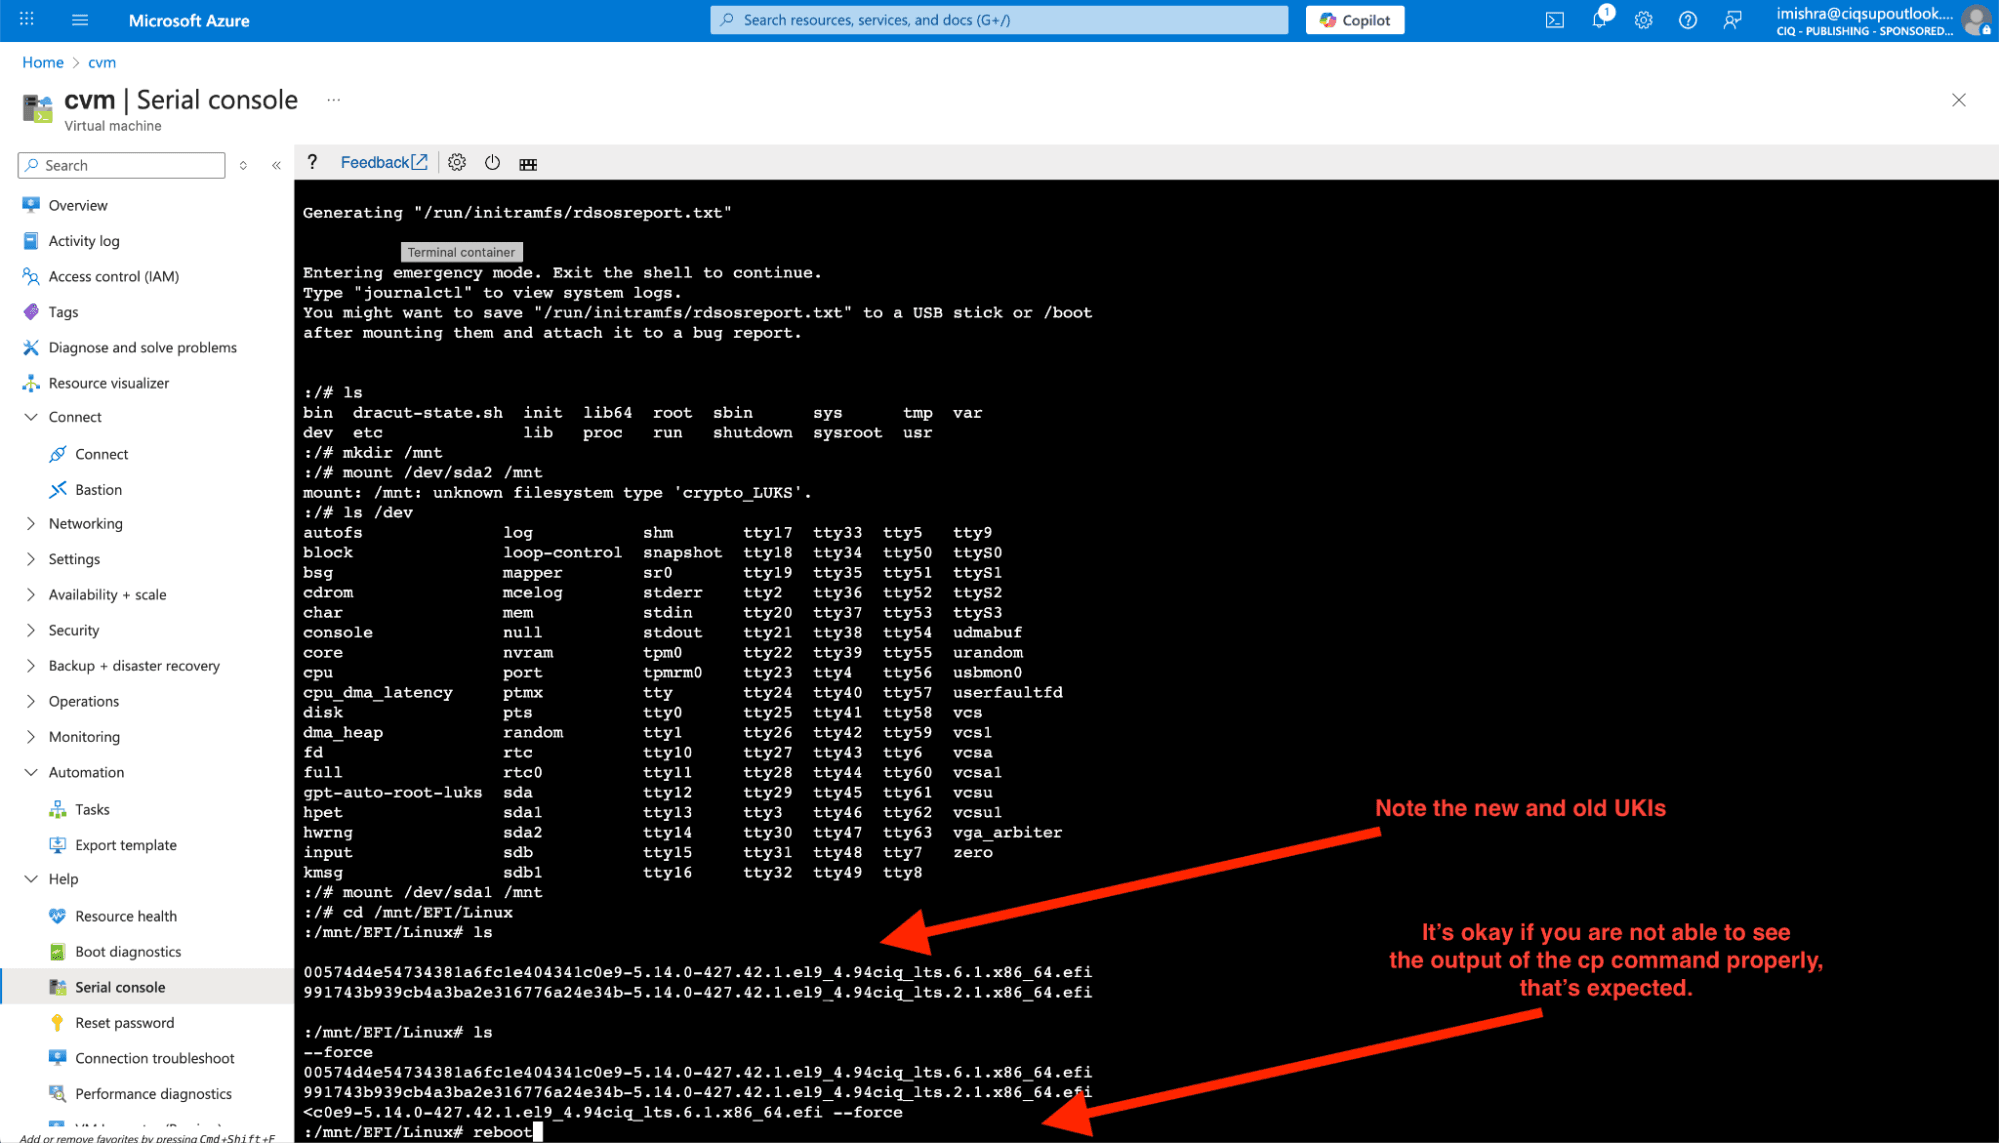
To give you an example in this walkthrough, we deliberately installed a kernel package which didn’t have a Secure Boot signature so it would intentionally fail and you can see all recovery steps in this guide.
Use the console to remove the undesired kernel.
cd /mnt/EFI/Linux
ls
You will see two or more UKIs here. In this example, the newest version is the “wrong” one.
# Example output:
# ...-5.14.0-427.42.1.el9_4.94ciq_lts.6.1.efi \<- UKI with the new, faulty kernel
# ...-5.14.0-427.42.1.el9_4.94ciq_lts.2.1.efi \<- UKI with the previous, working kernel
Overwrite the faulty UKI with the last good UKI. This will fix the boot issues, and you’ll be able to re-launch the system normally. The filenames of these kernels are quite long so it may not display correctly when you type out this command:
cp [previous-UKI].efi [current-UKI].efi --force
reboot
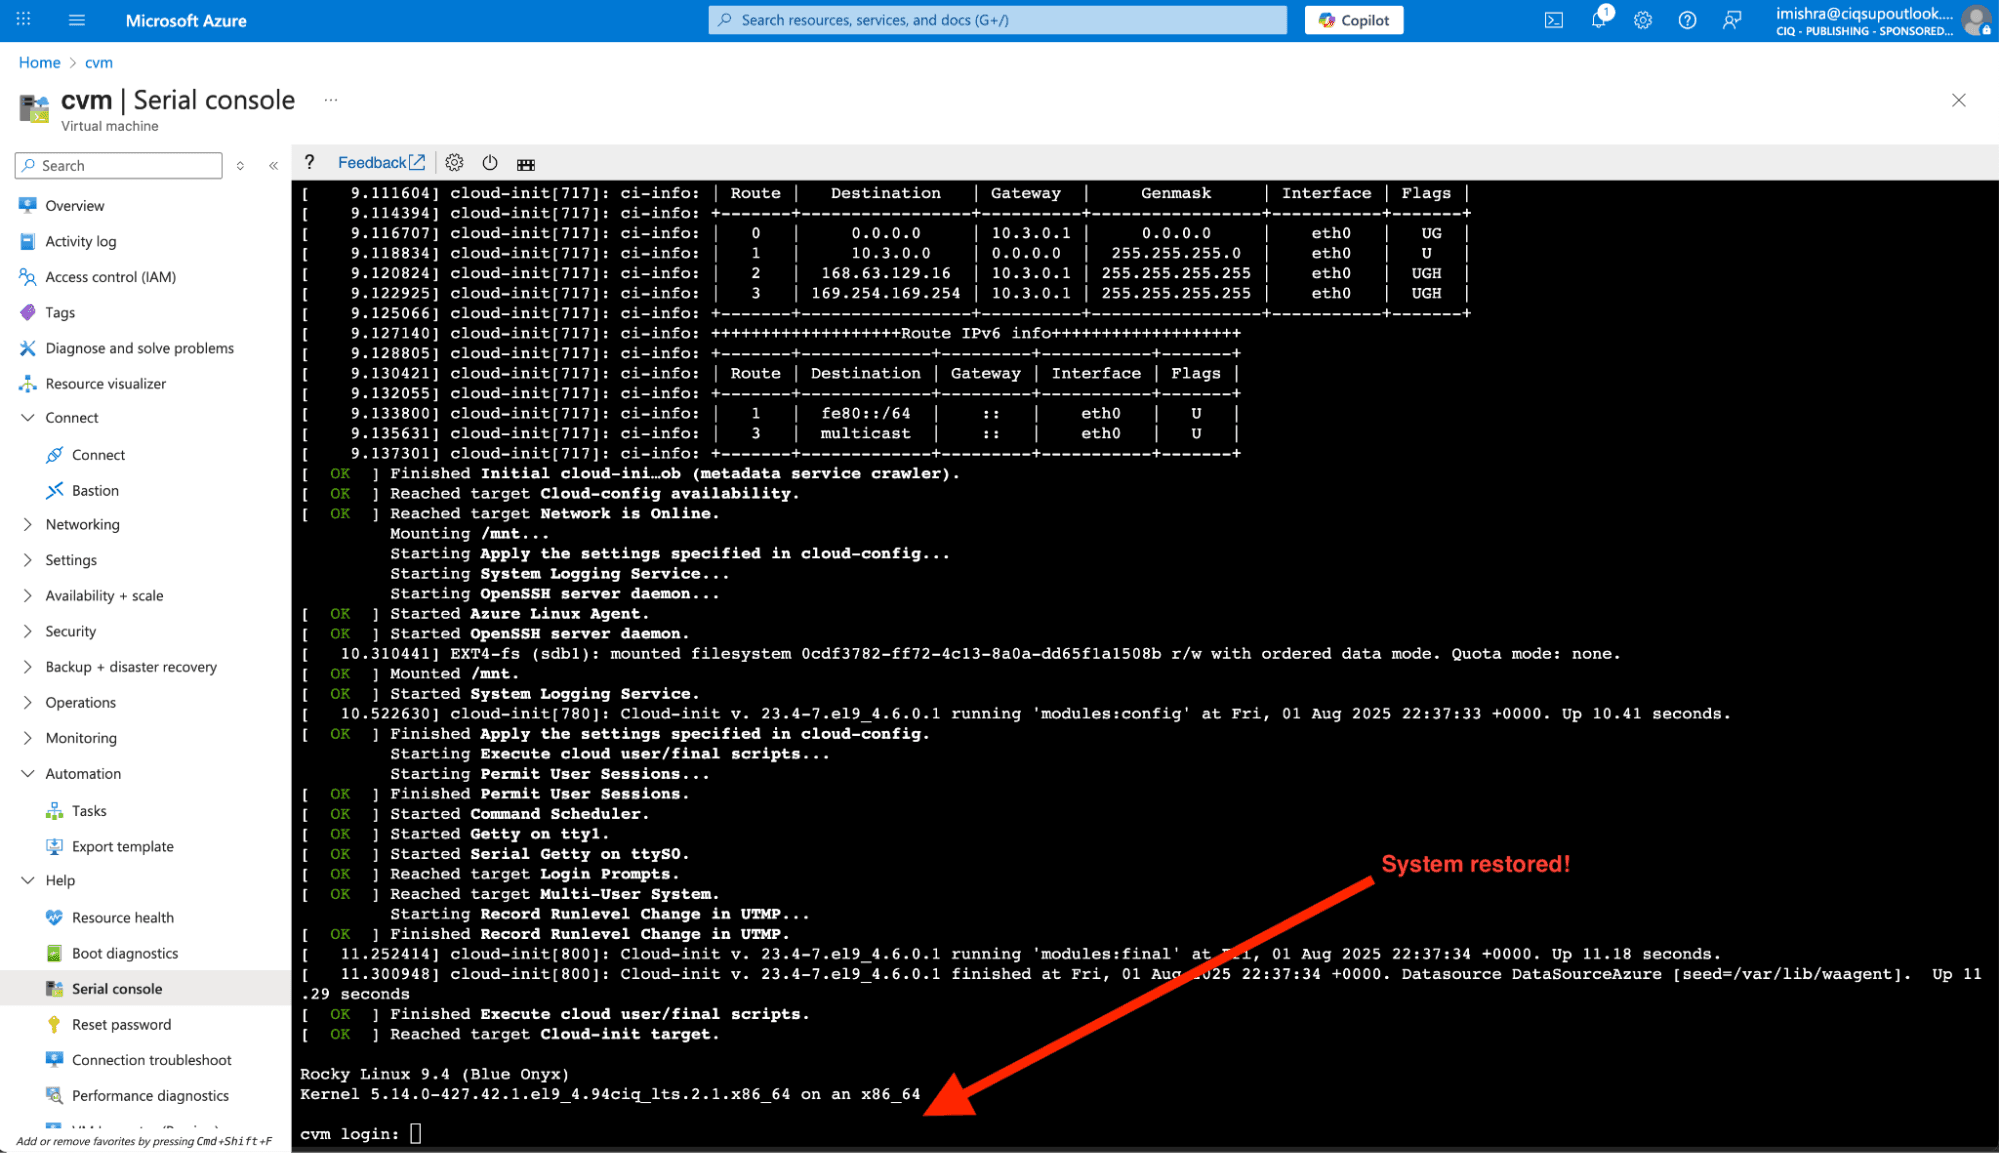
Now that you’re back in and the system is operating normally, you can proceed as usual to clean up any issues which remain from the misconfiguration scenario and try again.


Built for scale. Chosen by the world’s best.
2.75M+
Rocky Linux instances
Being used world wide
90%
Of fortune 100 companies
Use CIQ supported technologies
250k
Avg. monthly downloads
Rocky Linux
Have questions about your infrastructure?
Talk to a CIQ engineer about Rocky Linux, HPC, and AI infrastructure.